Introduction
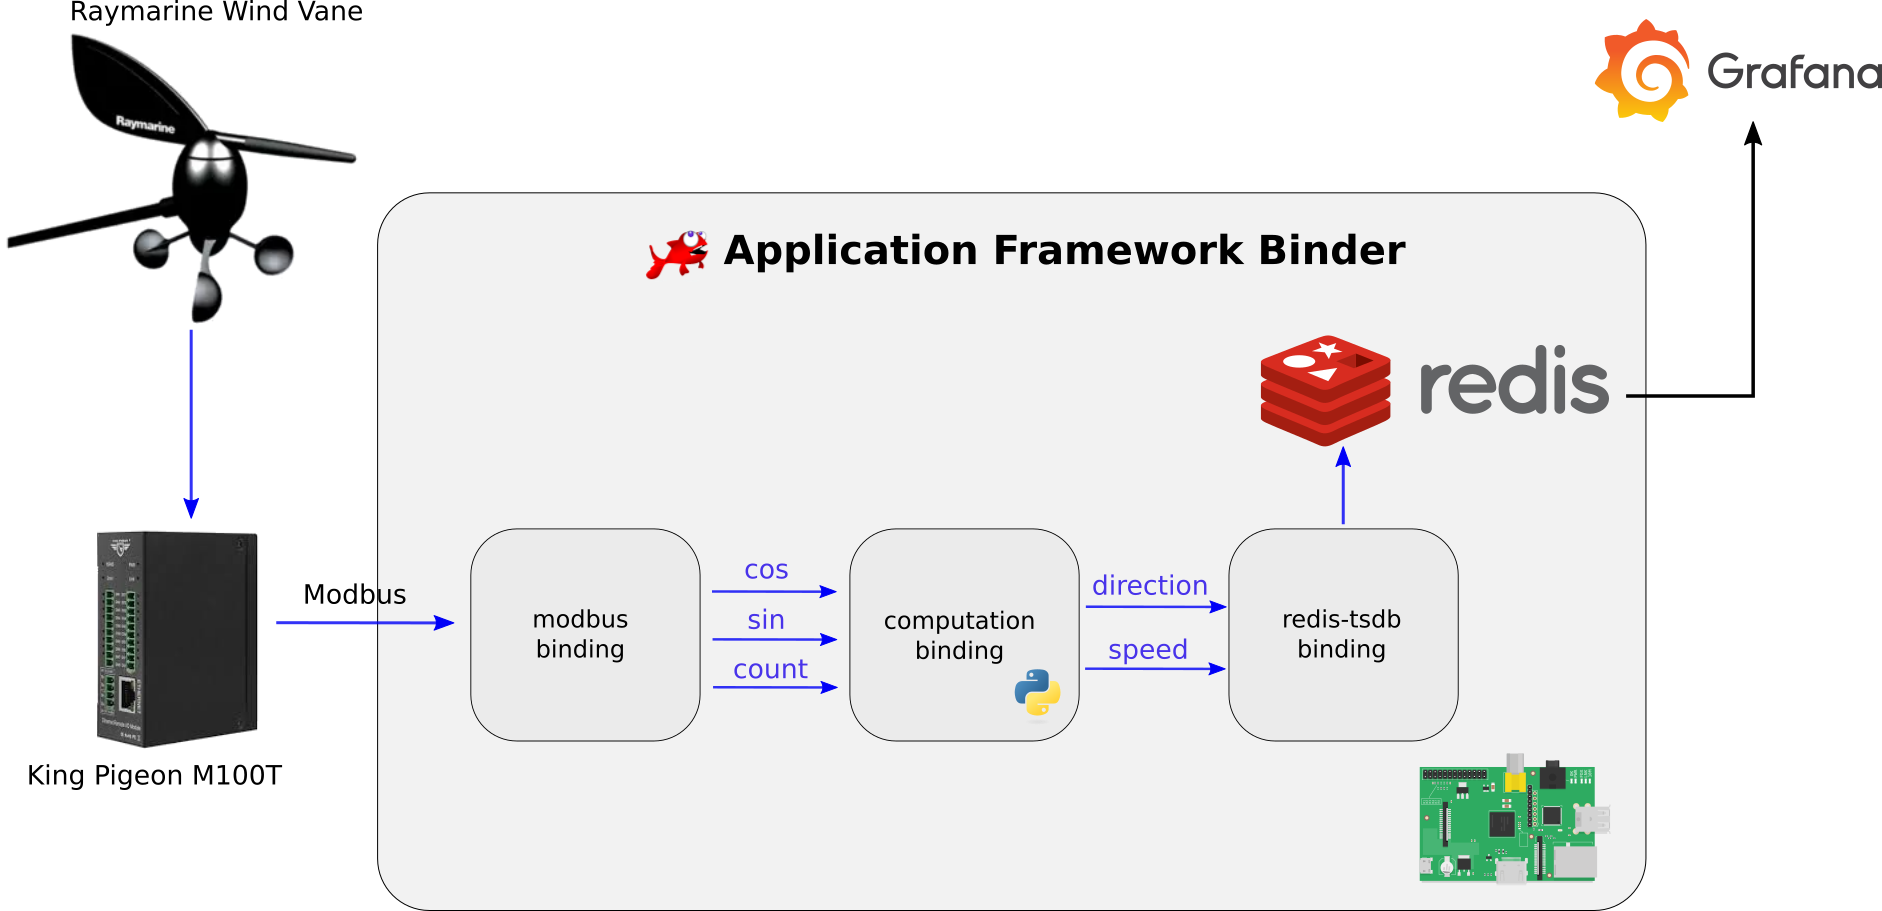
The goal of this demonstration is to discover and understand every aspect of redpesk by following a project from the creation to its deployment. Starting from a wired wind sensor, we will store and access its data in a database. Each important point will be highlighted and explained.
The hardware is not compulsory to follow this demonstration. You can use a board and simulate Modbus frames, use the wind vane and emulate a board with QEMU, or simulate everything.
How to follow the demo
In this demonstration several methods are used, you will see at the beginning of each part if they are skippable or not. If you follow the demo with the aim of discovering and understanding redpesk, it is advised not to skip parts.
Presentation
Components
The demonstration is board-agnostic, you can use any board where a redpesk image is available. For the example, we will use a Raspberry Pi 4.
- Boards
- Emulated (QEMU)
- Architecture: x86_64
- OS: redpesk-batz-2.1-update-x86_64
- Raspberry Pi 4
- Architecture: aarch64
- OS: redpesk-batz-2.1-update-aarch64
- Emulated (QEMU)
- A Wind Vane Raymarine ST60
- A Kingpigeon / BLIIOT M100T Modbus module
You can find further information about redpesk distributions in the chapter Concepts.
To do so, we will need several redpesk related software components:
- modbus-binding: modbus frames collection, translation and emission
-
afb-libpython: Python bindings over the Application Framework Binder - redis-tsdb-binding: data storage in a Time Series Database
In order to achieve the wind speed and direction computation, as well as the publication into a Redis timeseries, we will write a small binding in Python.
Project
