redpesk project setup
In this section there are commands to follow.
In order to develop, build and package our application in redpesk, you have to create a project in the redpesk factory. To do so, there are two possibilities:
- Use the web user interface, such as the community one
- Use the
rp-clitool to create your project directly from the command line
This section will present, for each step, the two possibilities.
rp-cli is the redpesk command line interface. You can find further information about rp-cli in the chapter Concepts.
Please refer to the main redpesk documentation about rp-cli to install it.
Then, configure rp-cli by using the following command:
rp-cli onboard
rp-cli will be connected to your redpesk account through the use of an access token that can be obtained from your profile’s page. See the main rp-cli documentation for detailed information.
rp-cli onboard
Do you want to configure the redpesk backend connection? (Y/n)
> Y

-- Backend link configuration requested by user --

Current available connections: [NONE]

Please enter the alias of the connection you want to change/create, then press enter:
If you want to change/create the default connection, press enter directly
>
Please enter the URL of the redpesk backend you want to interact with, then press enter:
> https://community-app.redpesk.bzh

Please visit https://community-app.redpesk.bzh with your favorite browser to create your access token!
The token section is available in your profile page. Please, paste your token here and press enter:
> 469427xx-xxxx-xxxx-xxxx-xxxxxxxxxxxx_xxxxxxxx-xxxx-xxxx-xxxx-xxxxxxxxx797
Deleting the previous configuration files...    [OK]
Creation of the configuration file...           [OK]
Modification of the token file...               [OK]

Do you want to configure the redpesk local-builder connection ? (Y/n)
> n
New project
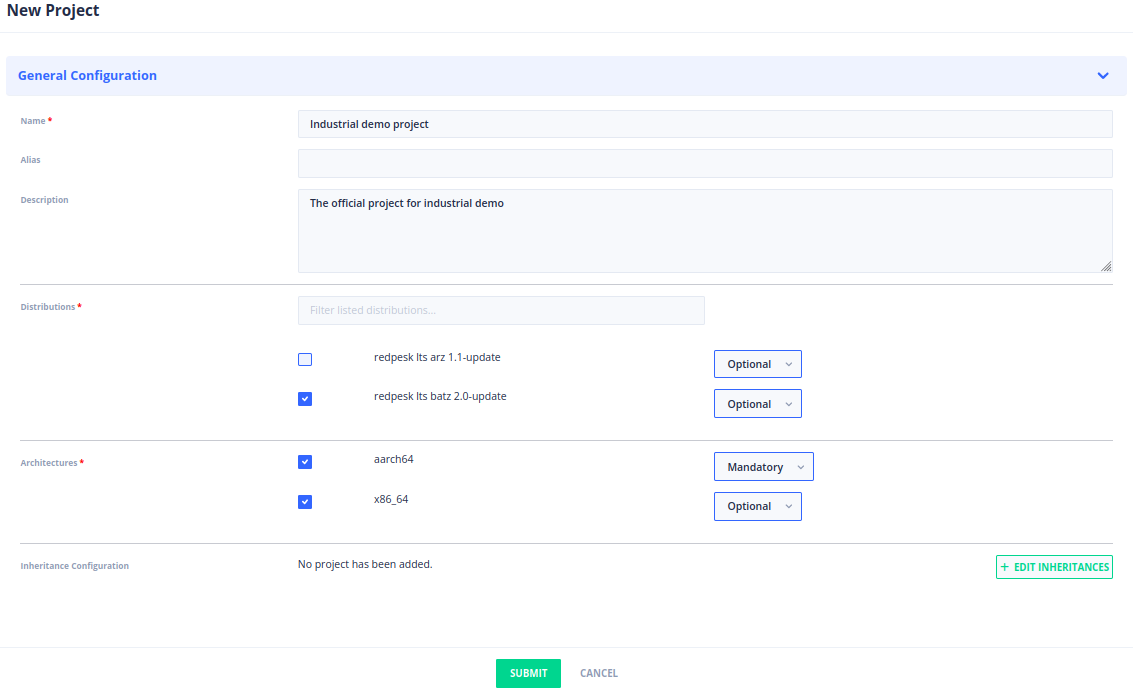
Once logged in your redpesk account, you can take a look at how to create the project. It is advised to use the latest distribution available. Both architectures (aarch64 and x86_64) will be used in this project.
UI
rp-cli
rp-cli projects add \
    --name "Industrial demo project"
    --description "The official project for industrial demo"
    --mandatory-distro redpesk-lts-batz-2.1-update
    --mandatory-arch aarch64
    --optional-arch x86_64

-- Project creation requested by user --
Checking that at least one architecture is set...   [OK]
Checking that at least one distribution is set...   [OK]
Creation of "Industrial demo project" project...    [OK]
You can check the list of your projects with:
rp-cli projects list
New application
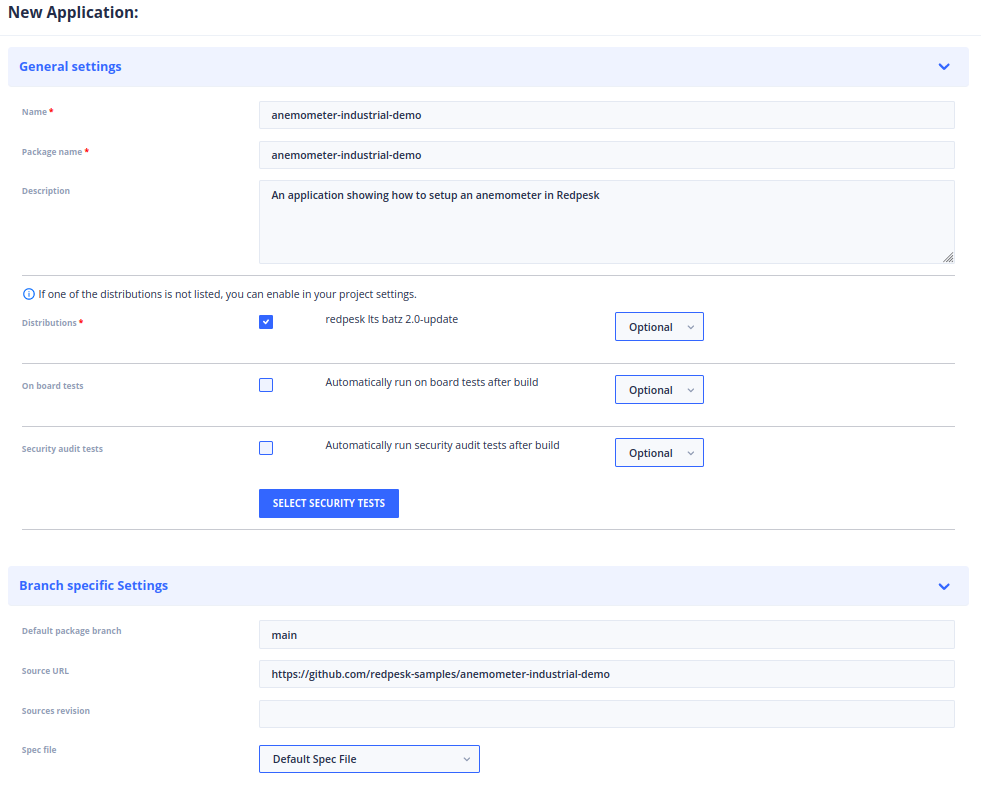
Now, the application can be created.
UI
rp-cli
rp-cli applications add \
    --project industrial-demo-project \
    --name anemometer-industrial-demo \
    --pkg-name anemometer-industrial-demo \
    --description "An application showing how to setup an anemometer in redpesk" \
    --source-url https://github.com/redpesk-samples/anemometer-industrial-demo
Because we keep the default settings of “Default spec file” for the spec file, it will be hosted on redpesk factory’s internal repository and we will be able to edit it directly online through the “File manager” tab of our project.