Configuration
rp-cli configuration is easy thanks to the rp-cli onboard command. The user can configure interactively the two things that rp-cli may need:
- Connection to the redpesk infrastructure (to create, read, build and test applications and projects on the redpesk infrastructure)
- Connection to the local builder (to build and package locally an application that exists in the redpesk infrastructure)
redpesk infrastructure access
In order to correctly communicate with the redpesk infrastructure, rp-cli needs to have the right parameters set.
To set these parameters easily and interactively, use the rp-cli onboard command, and answer yes (Y) to the first question it asks.
$ rp-cli onboard
Do you want to configure the redpesk factory connection? (Y/n)
> Y

-- Factory link configuration requested by user --

Current available connections: [NONE]

Please enter the alias of the connection you want to change/create, then press enter (default: 'default'):
>
Please enter the redpesk factory URL you want to interact with, then press enter (default: 'https://community-app.redpesk.bzh'):
> https://community-app.redpesk.bzh

Please visit https://community-app.redpesk.bzh/#/pages/my-settings with your favorite browser to create your access token!
You can create your token in the 'Access Tokens' section. Please, paste your token here and press enter:
> 469427d5-63bc-4795-b4a2-30a89fded77f_a81f5295-ef5b-429d-b7c5-99cb0863d797
Deleting the eventual cookie file...            [OK]
Creation/Update of the configuration file...    [OK]
Modification of the token file...               [OK]


Do you want to configure the redpesk local-builder connection? (Y/n)
> n
N.B.: For the moment the local-builder is not configured: indeed, we answered “n” to the last question.
rp-cli first asks for an alias for the connection. Unless there are several redpesk servers you want to connect to, simply press enter. Then, it asks for the redpesk URL. In our example, we use the URL of the community redpesk infrastructure, i.e. https://community-app.redpesk.bzh. Then it requests an access token. This access token needs to be created through the webUI, following the steps here below.
-
CTRL+click on the link given by rp-cli in your terminal (in our example: https://community-app.redpesk.bzh/#/pages/my-settings)
-
A new access token can be generated in the “Access Tokens” section
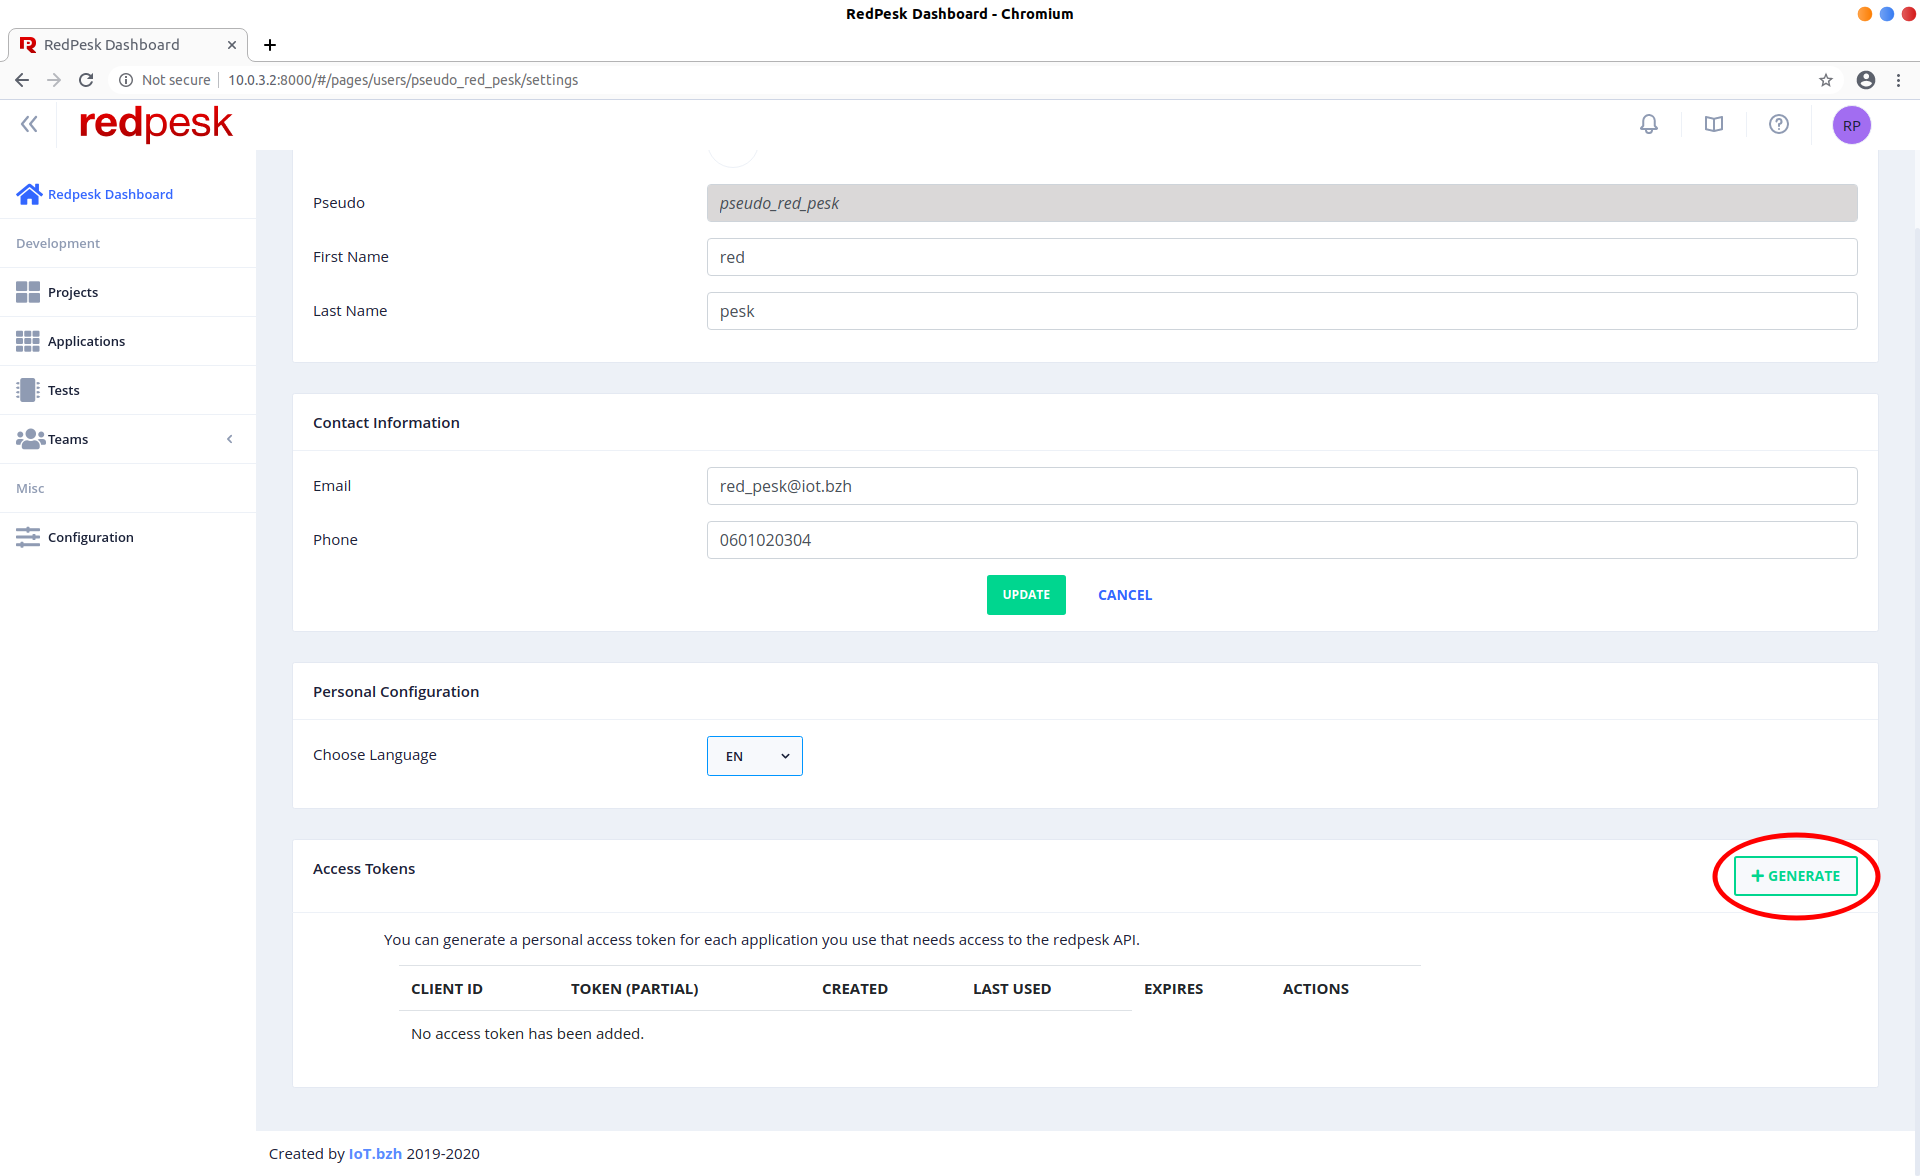
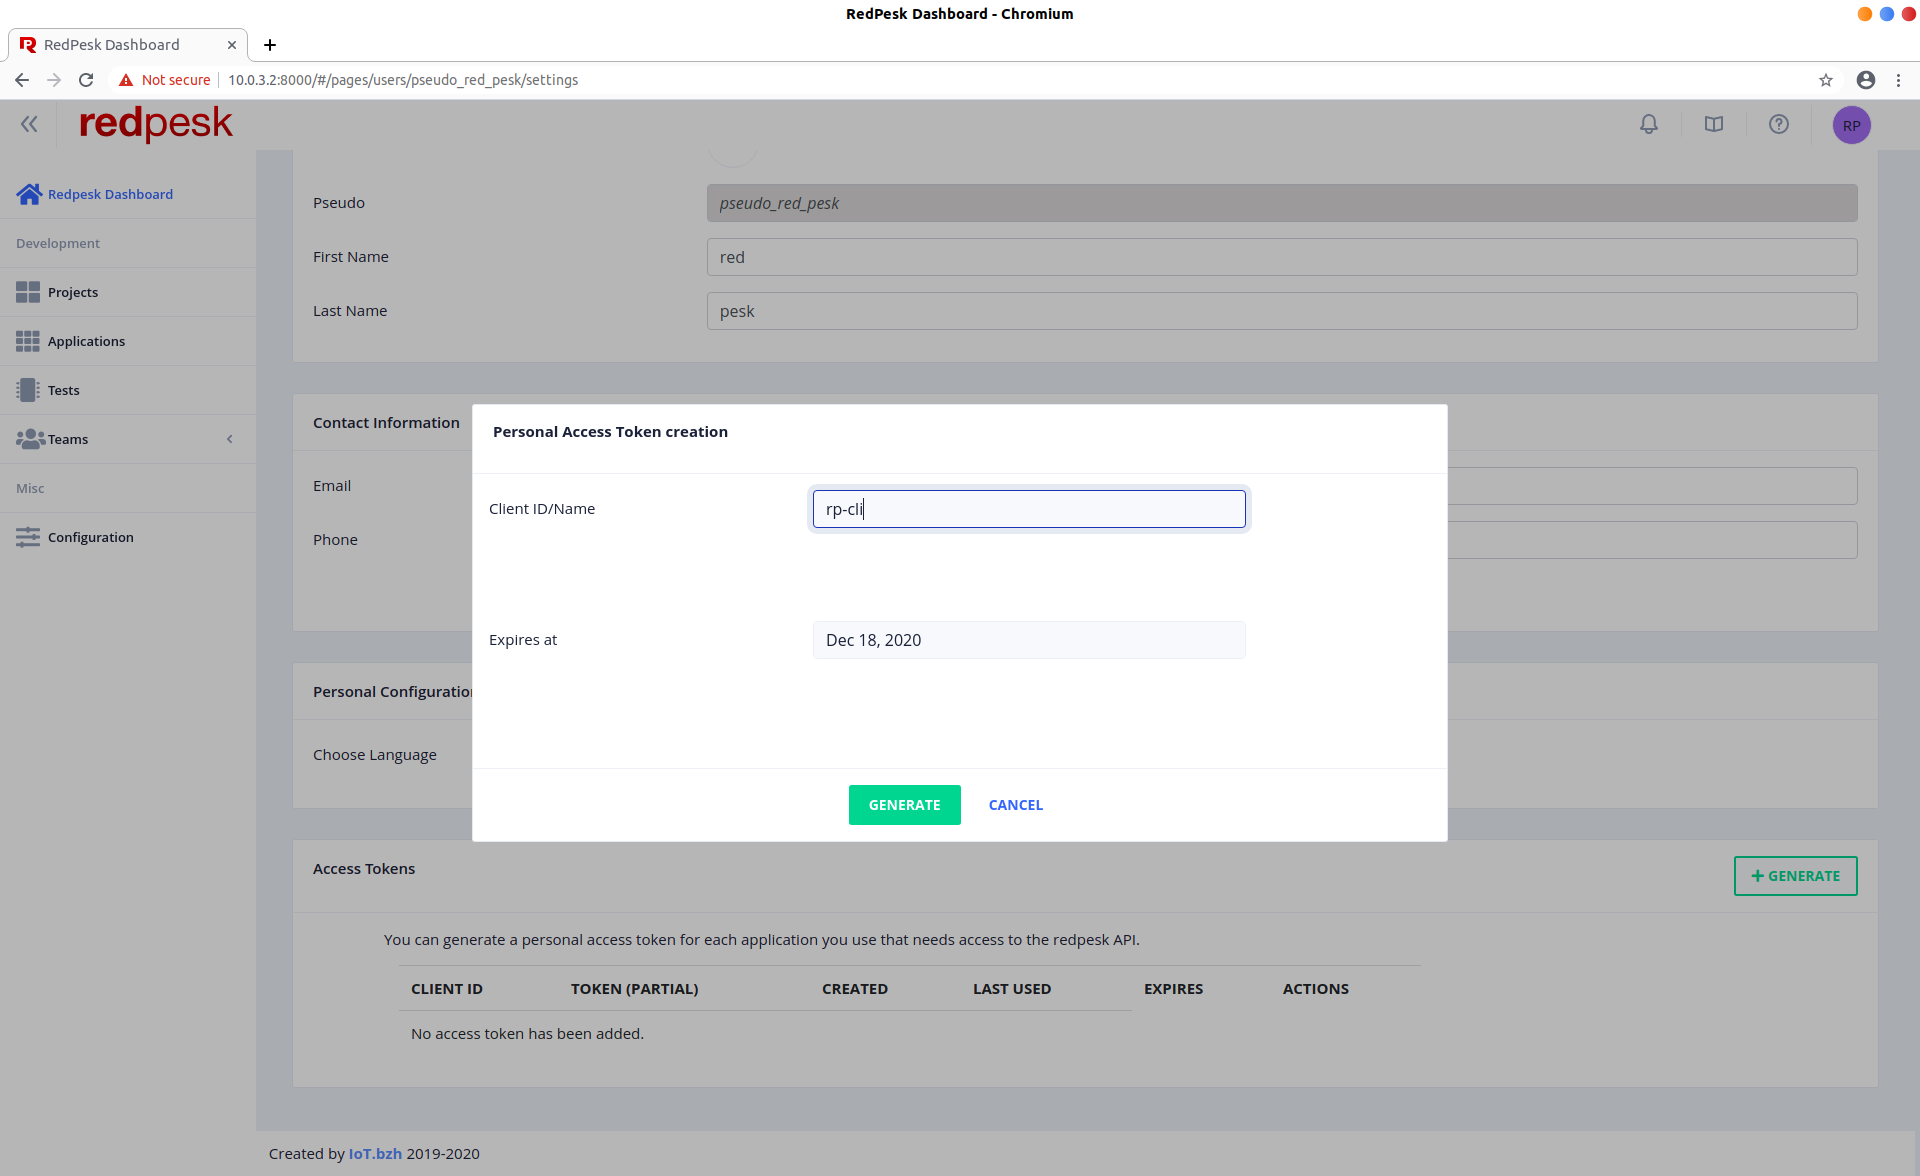
- Set the client ID as “rp-cli” and choose an expiration date that suits you
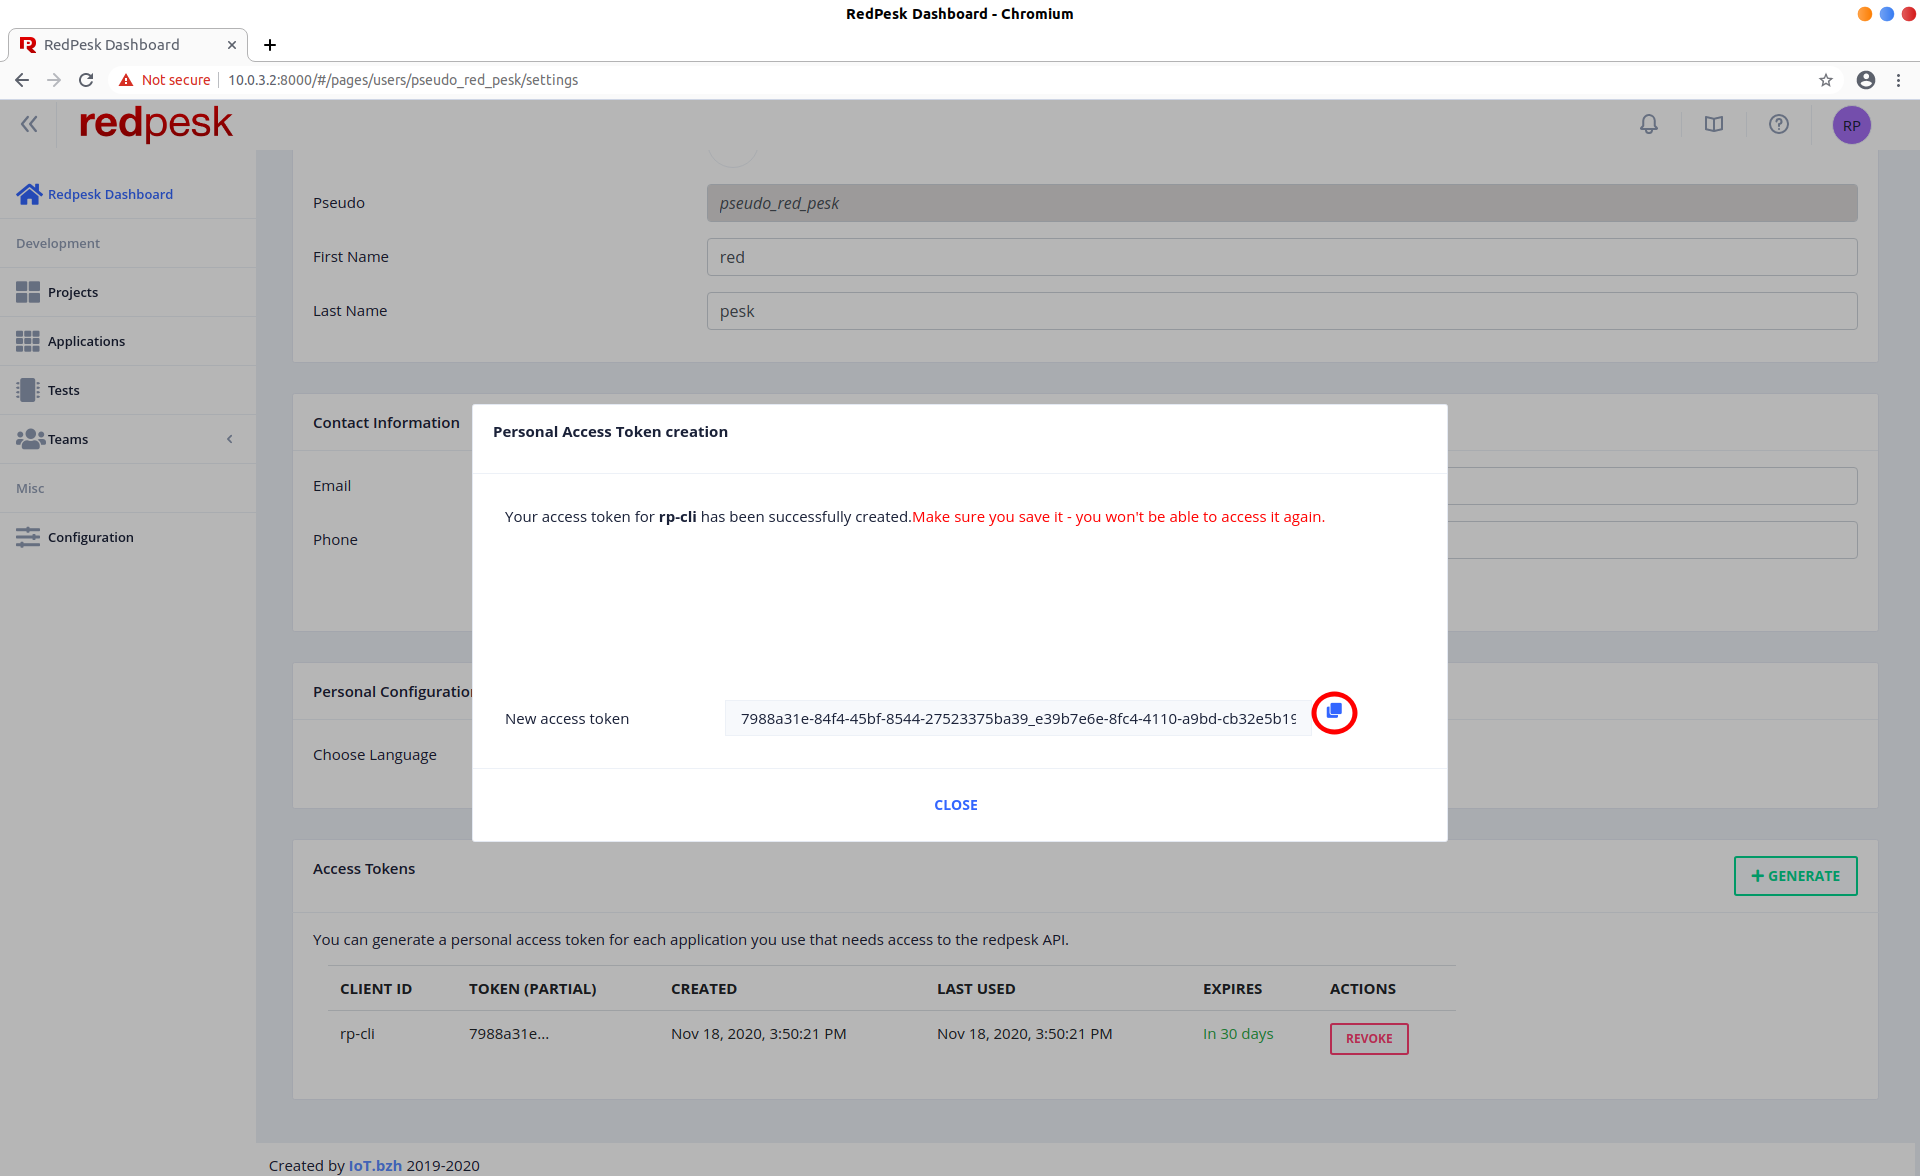
- Once the access token generated, copy it in your clipboard. Be careful, your access token is just displayed once!
Local builder connection
Local builder IP
Before configuring rp-cli to interact with the local builder, it is strongly advised to follow the installation guide of the local builder available here.
In the following guide, we consider that you choose the default path for the mounted directories in the local builder.
Once the connection to the redpesk infrastructure is completed, or if you have answered no (n) to the first question, the rp-cli onboard then asks if you want to configure the redpesk local-builder connection. Answer yes (Y).
$ rp-cli onboard
Do you want to configure the redpesk factory connection? (Y/n)
> n


Do you want to configure the redpesk local-builder connection? (Y/n)
> Y

-- Local builder link configuration requested by user --

Current available connections: [NONE]

Please enter the IP of the local builder you want to interact with (ex: 10.231.232.2), then press enter:
> 10.231.232.187
Modification of the local builder file...       [OK]

The default mounted directory (/home/devel/my_rp_builder_dir/gitsources) exists on the host, should it be used as 'gitsources' directory? (Y/n)

> y

The default mounted directory (/home/devel/my_rp_builder_dir/gitpkgs) exists on the host, should it be used as 'gitpkgs' directory? (Y/n)

> y
rp-cli first requests the IP of the local builder. Enter the IP of the corresponding container running on your host and press enter. To get this IP, three methods are available, depending if you are using docker, podman or incus.
- With
docker
> docker inspect -f json redpesk-localbuilder |jq .[].NetworkSettings.IPAddress
"172.17.0.3"
- With
podman
Your container simply uses a port of your host. Hence, the address of the localbuilder is localhost.
- With
incus[DEPRECATED]
> incus ls redpesk-localbuilder
+----------------------+---------+---------------------+------+-----------+-----------+
|         NAME         |  STATE  |        IPV4         | IPV6 |   TYPE    | SNAPSHOTS |
+----------------------+---------+---------------------+------+-----------+-----------+
| redpesk-localbuilder | RUNNING | 10.171.7.234 (eth0) |      | CONTAINER | 0         |
+----------------------+---------+---------------------+------+-----------+-----------+
Then, it checks that the ~/my_rp_builder_dir/gitsources and ~/my_rp_builder_dir/gitpkgs directories exist. If they exist, it asks the user if he wants to use them as gitsources and gitpkgs mounted directories.
If, at local builder installation time, you chose the default mounted directories, it is all good for you! In the other case, answer n to the question and enter the right path.
Configuration check
In order to verify that the whole configuration went well, run the rp-cli local check-setup. You should have an [OK] return to every line.
> rp-cli local check-setup

-- Local check requested by user --

Check factory connection...         [OK]
Check local-builder connection...   [OK]
Check local-builder mount-points... [OK]
Check QEMU set-up...                [OK]
Shell Completion
The rp-cli user experience takes advantage of the shell completion. All the installation and configuration steps needed by completion are automatically handled when installing the redpesk-cli package.
Autocompletion usage
Using rp-cli’s autocompletion is really simple, and as you may already know, autocompletion can really be a timesaver!
In order to use it, simply start typing the command line you want, and then hit [TAB][TAB]. Depending on what you are currently typing, the completion suggests you the end of your command.
It even looks for the projects/applications list from the backend to suggest them to you. You can find some examples here below.
# Get the list of sub-commands with autocompletion
$ rp-cli [TAB][TAB]
admin         (Commands group for the redpesk factory administration)       misc          (Miscellaneous commands group)
applications  (Applications commands group)                               onboard       (Set up the whole rp-cli configuration interactively)
help          (Help about any command)                                    projects      (Projects commands group)
images        (Images commands group)                                     teams         (Teams commands group)
iotpkg        (Iotpkg wrapper (iotpkg running within the local-builder))  users         (Users commands group)
local         (Local commands group)

# Get the list of mandatory flags in "applications add" sub-command
$ rp-cli applications add -[TAB][TAB]
--name      ([Mandatory] Name of the application to create)
--pkg-name  ([Mandatory] RPM package name that must match the "name" value of the specfile)
-n          ([Mandatory] Name of the application to create)

# Get the list of available applications to build
$ rp-cli applications build [TAB][TAB]
helloworld-binding      python3-pytest-tap      python3-tap-py          redtest-helloworld-api

# Etc.
Administrator use
An admin sub-commands group is hidden by default in the rp-cli tool. In order to see these commands in the helpers and to have the completion features enabled on the admin sub-commands, you need to prove rp-cli that you are an administrator of the redpesk factory.
In order to do that, you need first to correctly configure rp-cli to communicate with the redpesk factory you are using (cf. paragraphs here above).
Then, simply run the following command.
$ rp-cli admin init
-- Check and initialize admin rights --
Result: [OK]
From now, you have access to the full admin sub-command and the completion on it.