Application deployment
Now that your application have been generated thanks to redpesk CI or the rp-cli, let’s see how to install it on a board. Since redpesk support cross-compilation, we can use either a x86_64 or aarch64 board to get your package installed in.
During this part, two cases will be studied: Emulated x86_64 board: qemu-x86_64 and Real aarch64 board: m3ulcb.
1. Get a redpesk OS image
Two choices here:
- you can either chose to build your custom redpesk OS image containing your own application. In this case just go to the image-creation section.
- or you can download a ready-to-use redpesk OS image from here.
2. Run a redpesk OS image
Once you have your image file, you can extract and boot it with Qemu or flash it on the target. This section will deal with both types of image: x86_64 & aarch64. For example :
3. Retrieve and add your repositories on the board
In order to be able to install your freshly built application into your board, you have to tell the board where this application can be found.
dnf utility, as any other package manager, works with packages repositories.
So basically you have to add a new package repository, corresponding to your project.
It can be done using either one of these two methods:
- WebUI method
- Command line method (using
rp-cli)
WebUI method
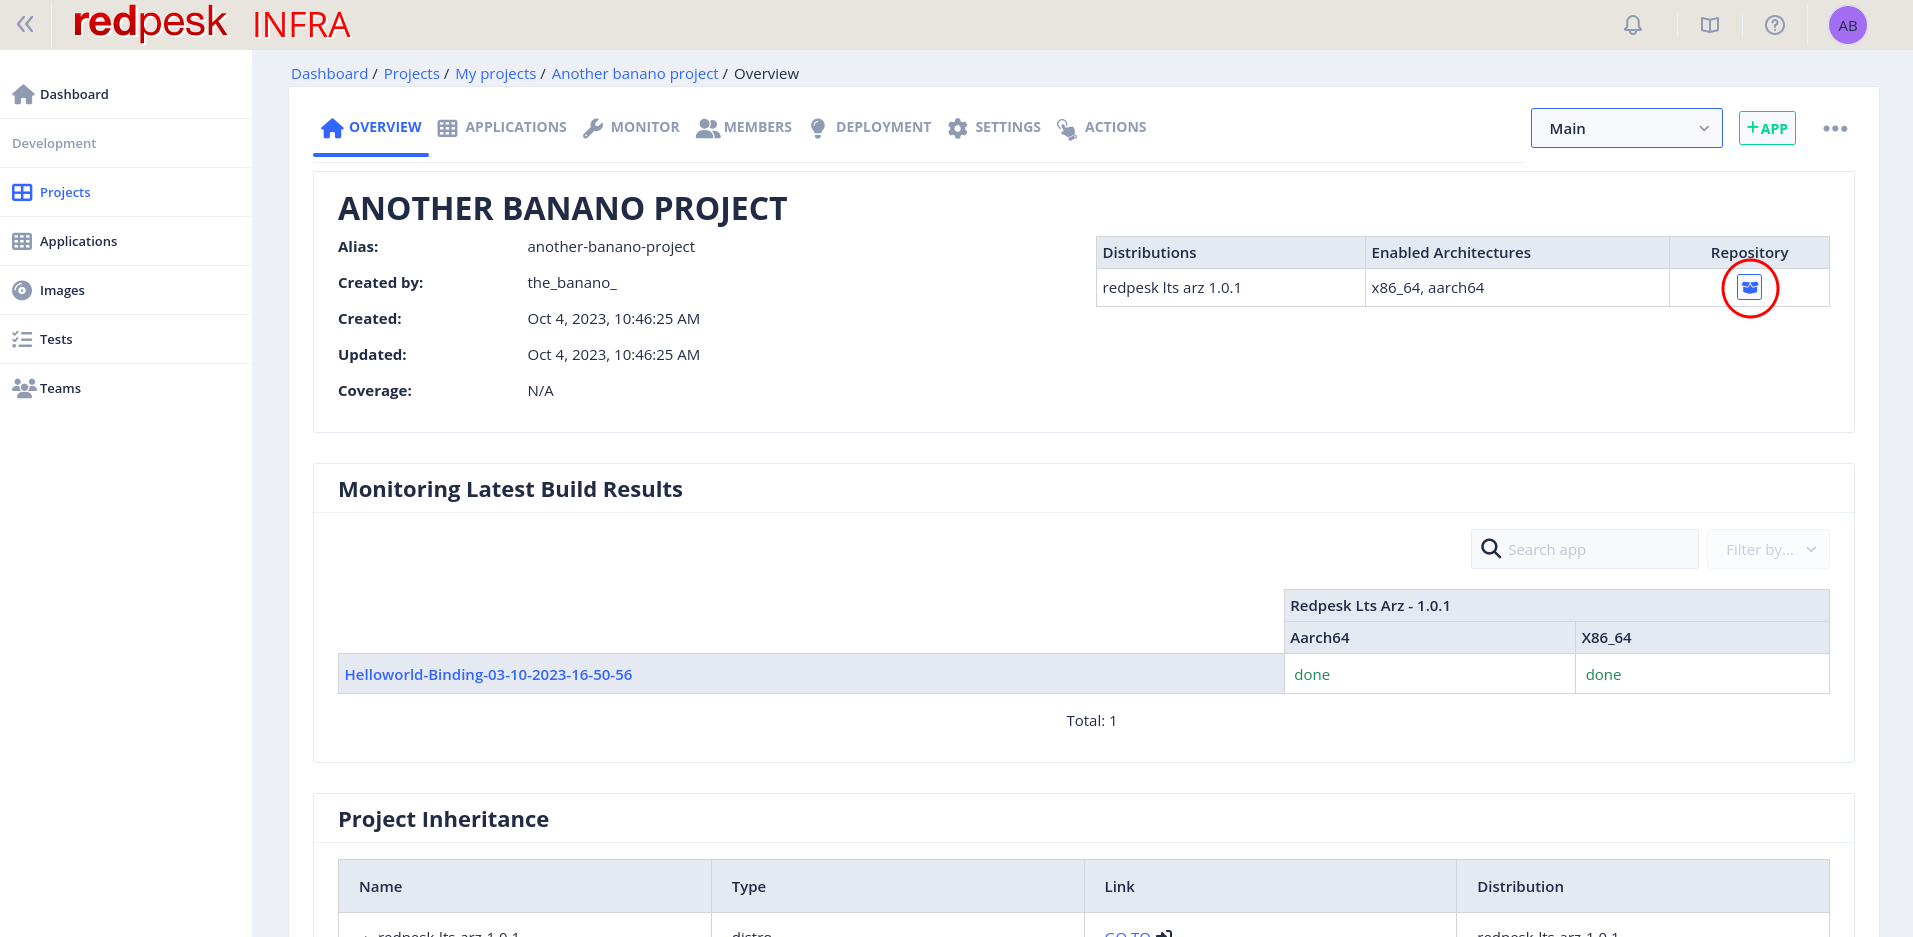
On the webUI, goes under the overview of your project containing your application. On your right, click on the “repository” icons.
Another window appears. It contains several parts. Copy the first one by clicking on the button on the right.
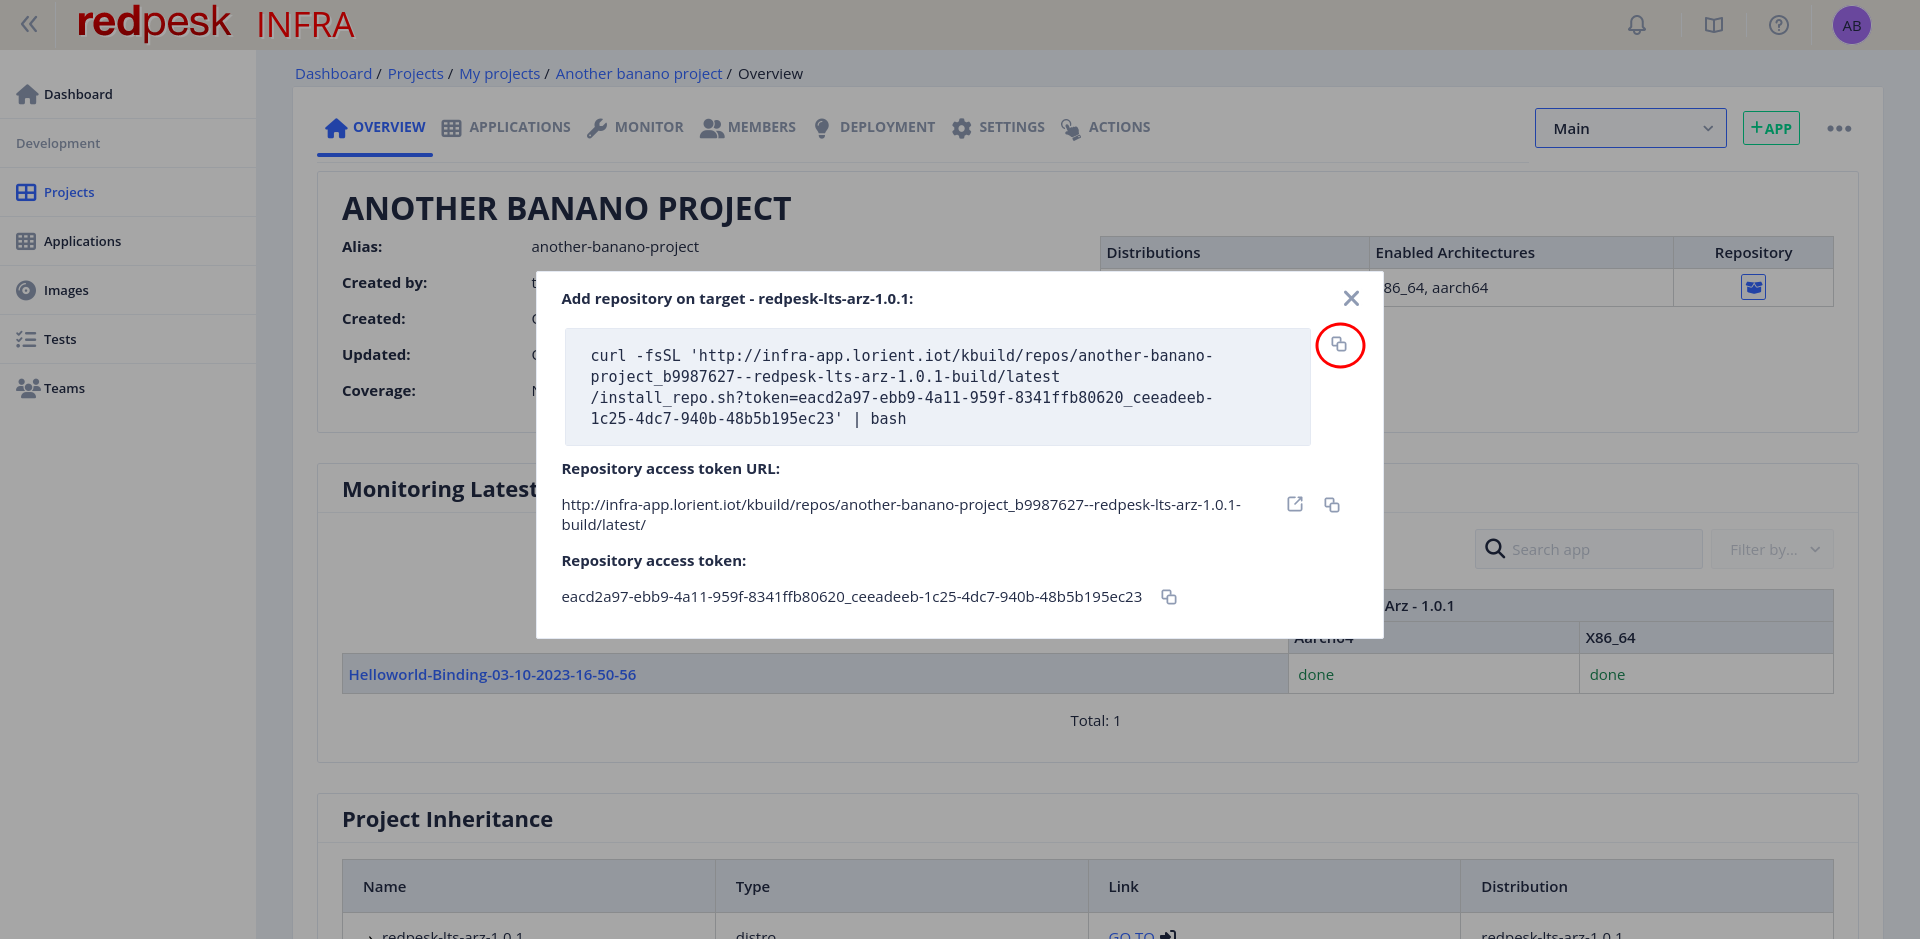
Paste and run the command line you just copied inside the target board terminal. Your project repository is now installed on the target!
Command line method
Run the following command with rp-cli. Here the project slug is another-banano-project.
$ rp-cli projects get another-banano-project --repository
ID					 Slug			 Name			 Version	 Type
b9987627-7dd9-4cc7-967d-f95db7f903ab 	 another-banano-project  Another banano project  [Not set] 	 standard-applications


Repository URL:
-------------------------

redpesk-lts-arz-1.0.1
  -> http://infra-app.lorient.iot/kbuild/repos/another-banano-project_b9987627--redpesk-lts-arz-1.0.1-build/latest/?token=facd2a97-ebb9-4a11-959f-8341ffb80620_ceeadeeb-1c25-4dc7-940b-48b5b195ec23


Add repository on target:
-------------------------

redpesk-lts-arz-1.0.1
  -> curl -fsSL 'http://infra-app.lorient.iot/kbuild/repos/another-banano-project_b9987627--redpesk-lts-arz-1.0.1-build/latest/install_repo.sh?token=facd2a97-ebb9-4a11-959f-8341ffb80620_ceeadeeb-1c25-4dc7-940b-48b5b195ec23' | bash
Then, in the output, you just have to copy the command corresponding to the distribution you want (here there is just one, starting with curl).
Paste and run the command line you just copied inside the target board terminal. Your project repository is now installed on the target!
4. Install your package
There are no difference in the command related to your package installation, neither in a x86_64, nor in an aarch64 redpesk distribution. Once you get in your redpesk image, you can proceed to the package installation.
NOTE:
The default redpesk OS image already contains the helloworld-binding installed by default. This example below will use it as it was not already on the image.
To be in the same situation just remove the app from your image :dnf remove helloworld-binding
As a reminder, the helloworld-binding gather two sub-packages the helloworld-binding and the helloworld-binding-test. To install the widget sub-package, you can simply run
[root@localhost ~] dnf install helloworld-binding
If you correctly set your project name and version as explained in the Build part, you should have the following output during the package installation
[root@localhost ~] dnf install helloworld-binding
NOTICE: -- Install redpesk widget from /var/local/lib/afm/applications/helloworld-binding --
Start the service by running:
[root@localhost ~] afm-util start helloworld-binding
8628
This implies that your widget has been installed correctly. Check if your widget id is helloworld-binding.
[root@localhost ~] afm-util list --all
[
  {
    "description":"Provide an Helloworld Binding",
    "name":"helloworld-binding",
    "shortname":"",
    "id":"helloworld-binding",
    "version":"1.0",
    "author":"Iot-Team <frederic.marec@iot.bzh>",
    "author-email":"",
    "width":"",
    "height":"",
    "icon":"/var/local/lib/afm/applications/helloworld-binding/icon.png",
    "http-port":30001
  }
]
You can then start the service by running:
[root@localhost ~] afm-util start helloworld-binding
8628
For example, you can access to its verb ping which belong to its api helloworld thanks to a HTTP or websocket request sent to the port $PORT such as follow
- HTTP request
PORT=30001
# Need jq
curl -H "Content-Type: application/json" http://localhost:${PORT}/api/helloworld/ping | jq
- Websocket request
PORT=30001
afb-client -H ws://localhost:${PORT}/api?token=x\&uuid=magic helloworld ping
For both requests you should get the following answer from the first request
ON-REPLY 1:helloworld/ping: OK
{
  "response":0,
  "jtype":"afb-reply",
  "request":{
    "status":"success",
    "info":"Ping count = 0"
  }
}
Once again, if you correctly set your project name and version as explained in the Build part, to correctly stop your service
[root@localhost ~] afm-util kill helloworld-binding
true
And to remove your widget, simply run
[root@localhost ~] dnf remove helloworld-binding