GitHub Actions
The goal of this chapter is to demonstrate the possibility for a GitHub instance to interact with our redpesk factory.
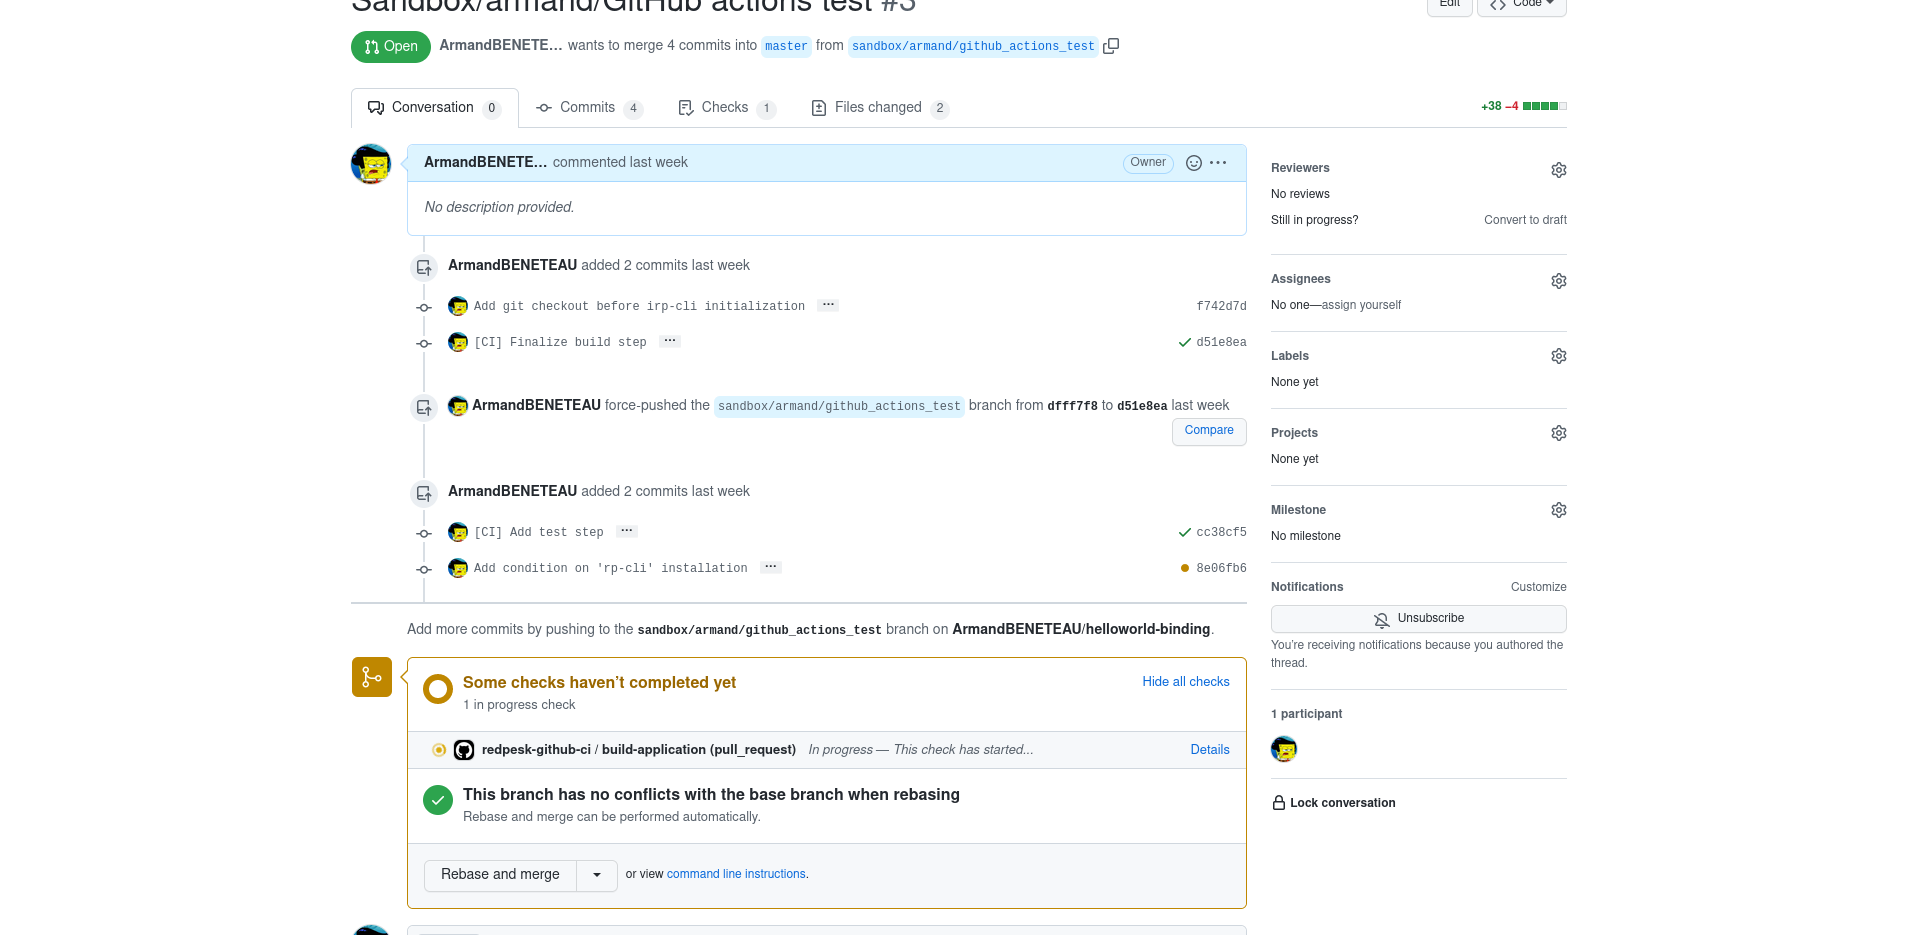
In order to do that, we will take the following example: we want to trigger an automatic build and test of an application, on a pull request opening in the GIT repository of this application. If a problem appears in the build or in the test, the pull request is “blocked” and cannot be merged. This allows the maintainer of the application to have a first automatic check that the new code added by the pull request does not lead to regressions.
GitHub environment
For this example we assume that our applications are hosted on github.com. Each “application” corresponds to a GitHub repository. In this example, we use the “Helloworld Binding” application, coming from redpesk OS (sources available here).
redpesk factory set-up
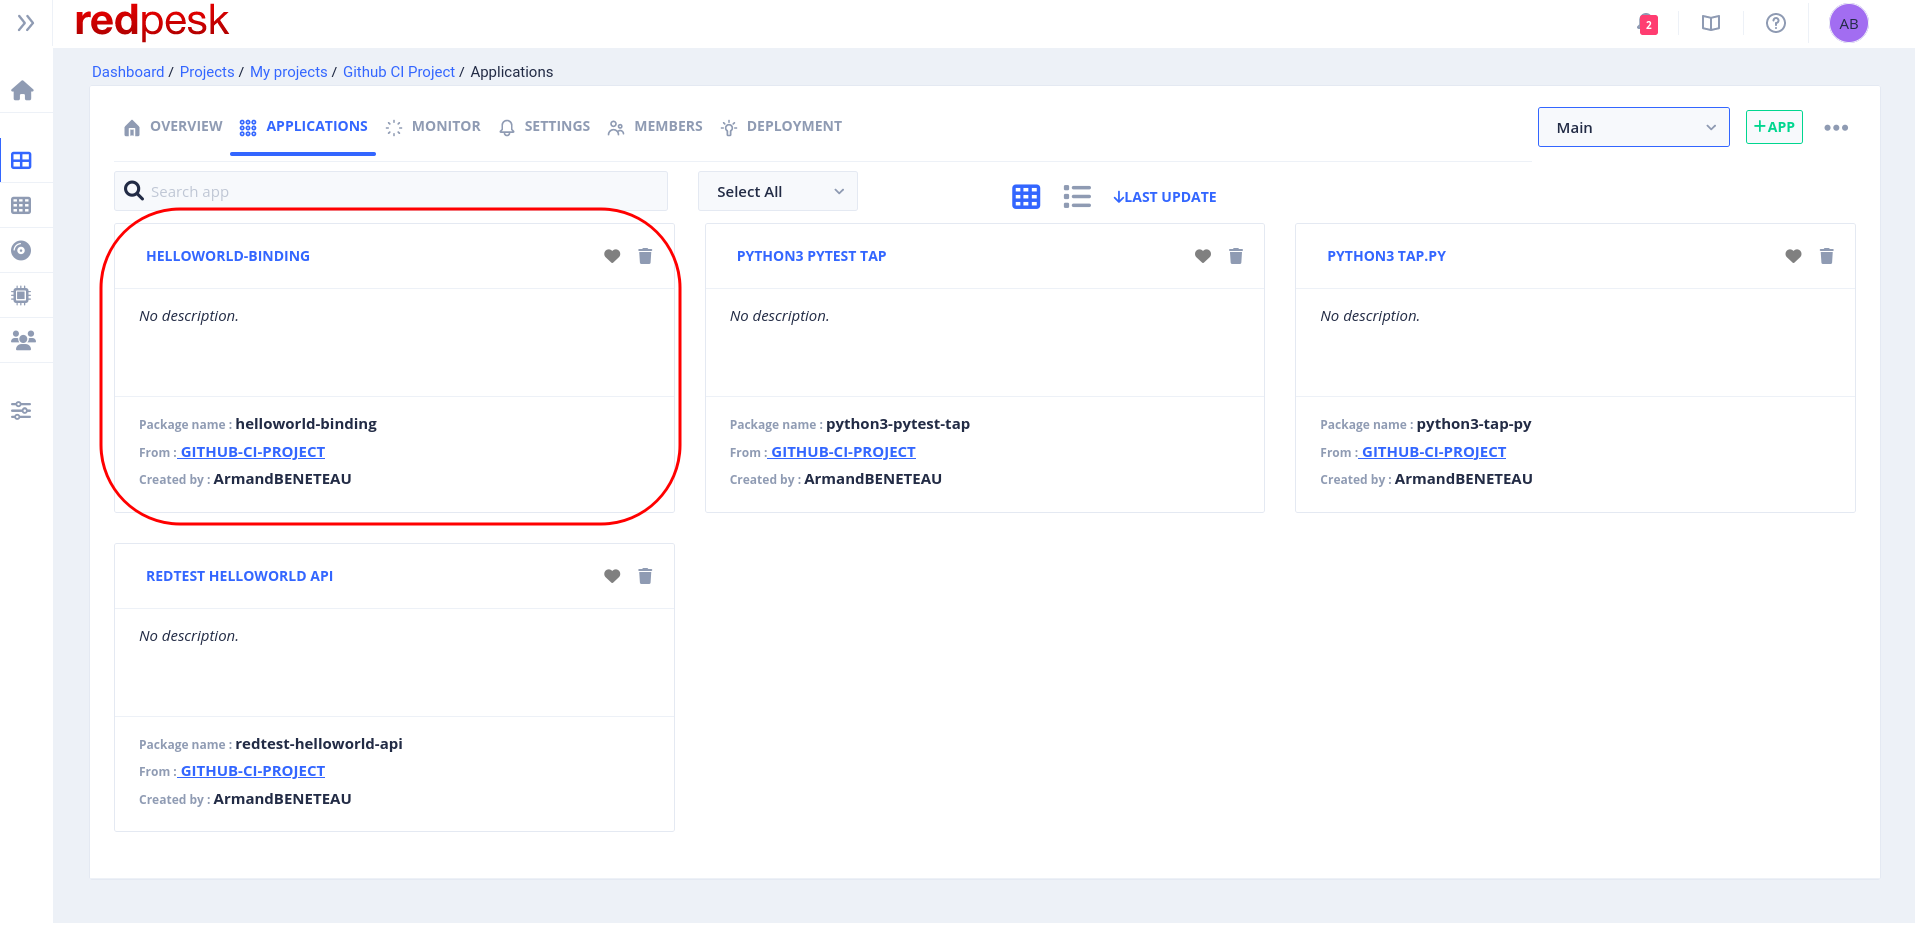
On the redpesk factory side, the corresponding application has been created. Its URL points to the corresponding GitHub repository seen in the previous paragraph.
Before going any further, make sure that the build and the test of your application are successful on the branch you have chosen.
GitHub repository set-up
In this paragraph we can have two cases. If you are using the redpesk community factory (https://community-app.redpesk.bzh) and the public GitHub instance you will have to use the github.com runners so please refer to the first paragraph. If you have your own redpesk factory you can have a dedicated GitHub runner in your factory, then, please refer to the second paragraph.
NOTE:
keep in mind that github.com limits the GitHub Actions allocated time per month for private repositories (cf. “About billing for GitHub Actions).
Having your own runner can be a way of having unlimited GitHub Actions time. If you want to have your own redpesk factory and/or your own GitHub Actions runner(s), feel free to contact us.
Set-up with GitHub-hosted runner(s)
In your application repository, on github.com, create the following directories .github/workflows/ at the root.
Then, under .github/workflows/, create the following redpesk-github-ci.yml file.
name: redpesk-github-ci
run-name: ${{ github.actor }} has started a Github action
on: [pull_request, workflow_dispatch]
env:
RP_REMOTE_FACTORY_URL: 'https://community-app.redpesk.bzh'
RP_REMOTE_FACTORY_TOKEN: ${{ secrets.RP_REMOTE_FACTORY_TOKEN }}
RP_FACTORY_PROJECT: 'github-ci-project'
RP_FACTORY_APP: 'helloworld-binding'
GH_SOURCE_BRANCH: ${{ github.head_ref }}
GH_TARGET_BRANCH: ${{ github.base_ref }}
GH_AUTHOR: ${{ github.actor }}
GH_PR_NUMBER: ${{ github.event.pull_request.number }}
jobs:
build-application:
runs-on: ubuntu-latest
steps:
- name: Install redpesk-cli in the runner
uses: redpesk-infra/github-setup-rp-cli-action@v2
with:
factory-url: "$RP_REMOTE_FACTORY_URL"
factory-token: "$RP_REMOTE_FACTORY_TOKEN"
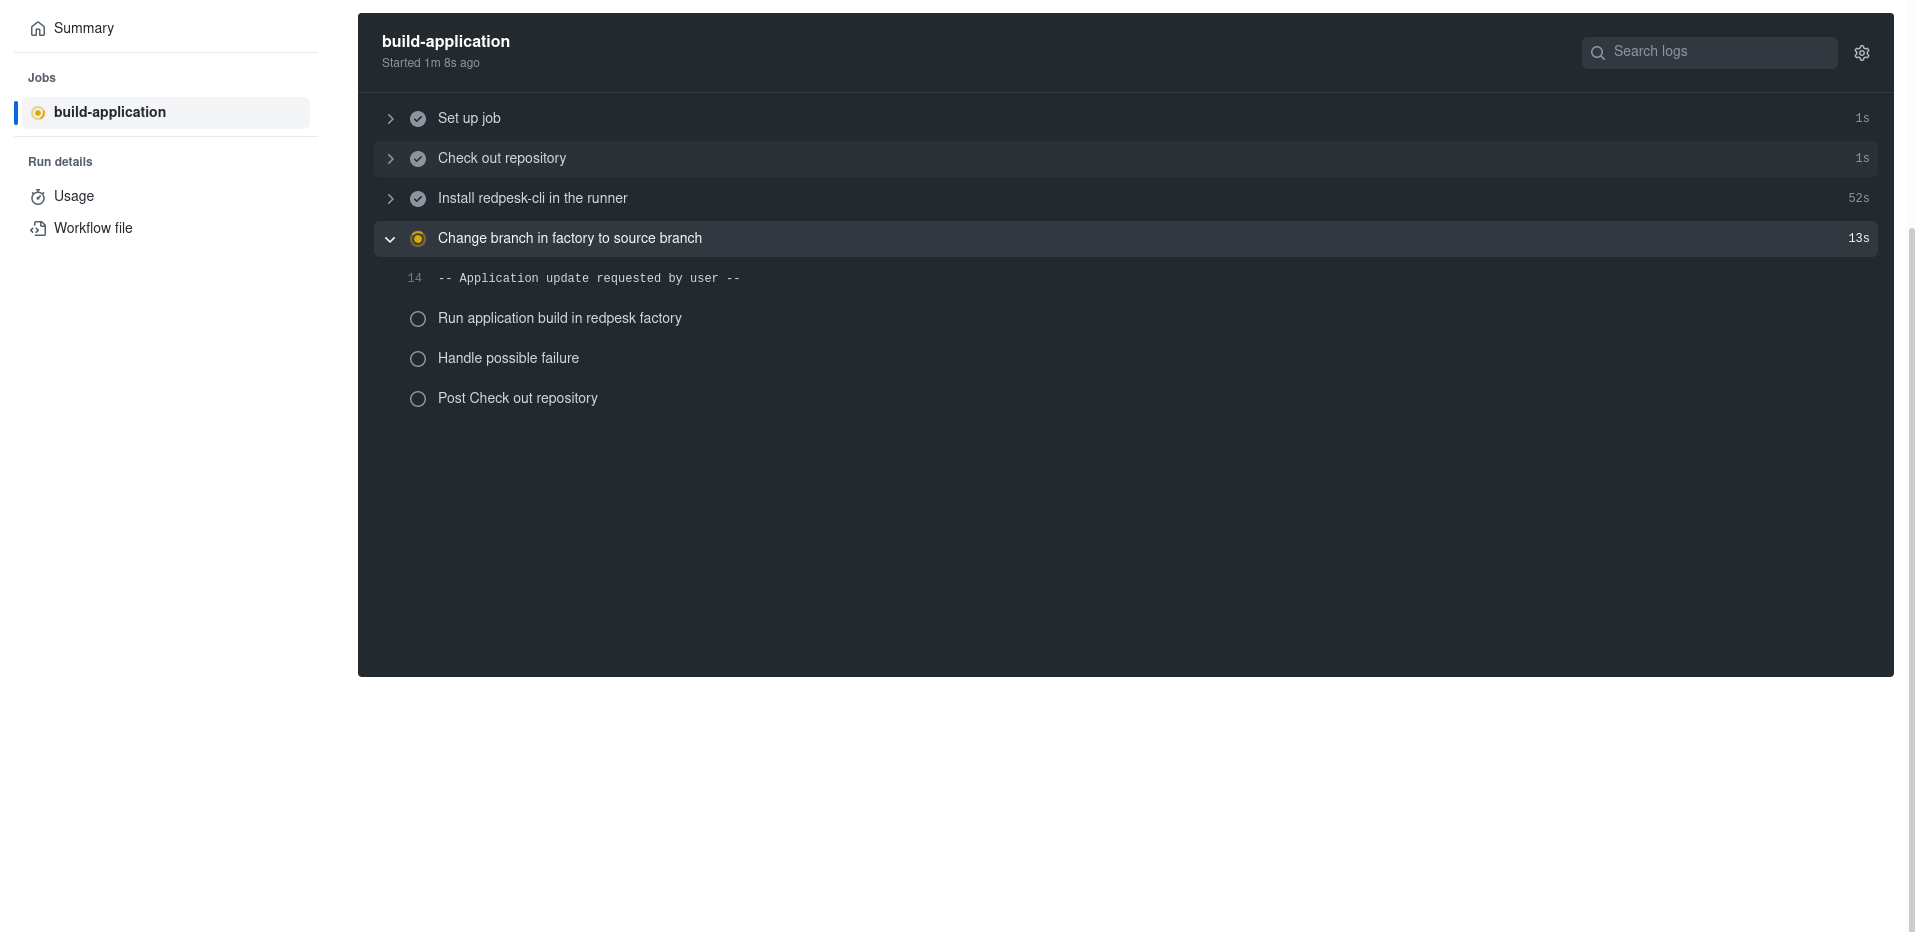
- name: Change branch in factory to source branch
run: rp-cli applications update "$RP_FACTORY_APP" -p "$RP_FACTORY_PROJECT" --source-rev "$GH_SOURCE_BRANCH"
- name: Run application build in redpesk factory
run: rp-cli applications build "$RP_FACTORY_APP" -p "$RP_FACTORY_PROJECT" --comment "[Github CI] Started for PR '$GH_PR_NUMBER', from author '$GH_AUTHOR'"
- name: Handle possible failure
if: ${{ failure() }}
run: rp-cli applications update "$RP_FACTORY_APP" -p "$RP_FACTORY_PROJECT" --source-rev "$GH_TARGET_BRANCH"
test-application:
runs-on: ubuntu-latest
needs: build-application
steps:
- name: Install redpesk-cli in the runner
uses: redpesk-infra/github-setup-rp-cli-action@v2
with:
factory-url: "$RP_REMOTE_FACTORY_URL"
factory-token: "$RP_REMOTE_FACTORY_TOKEN"
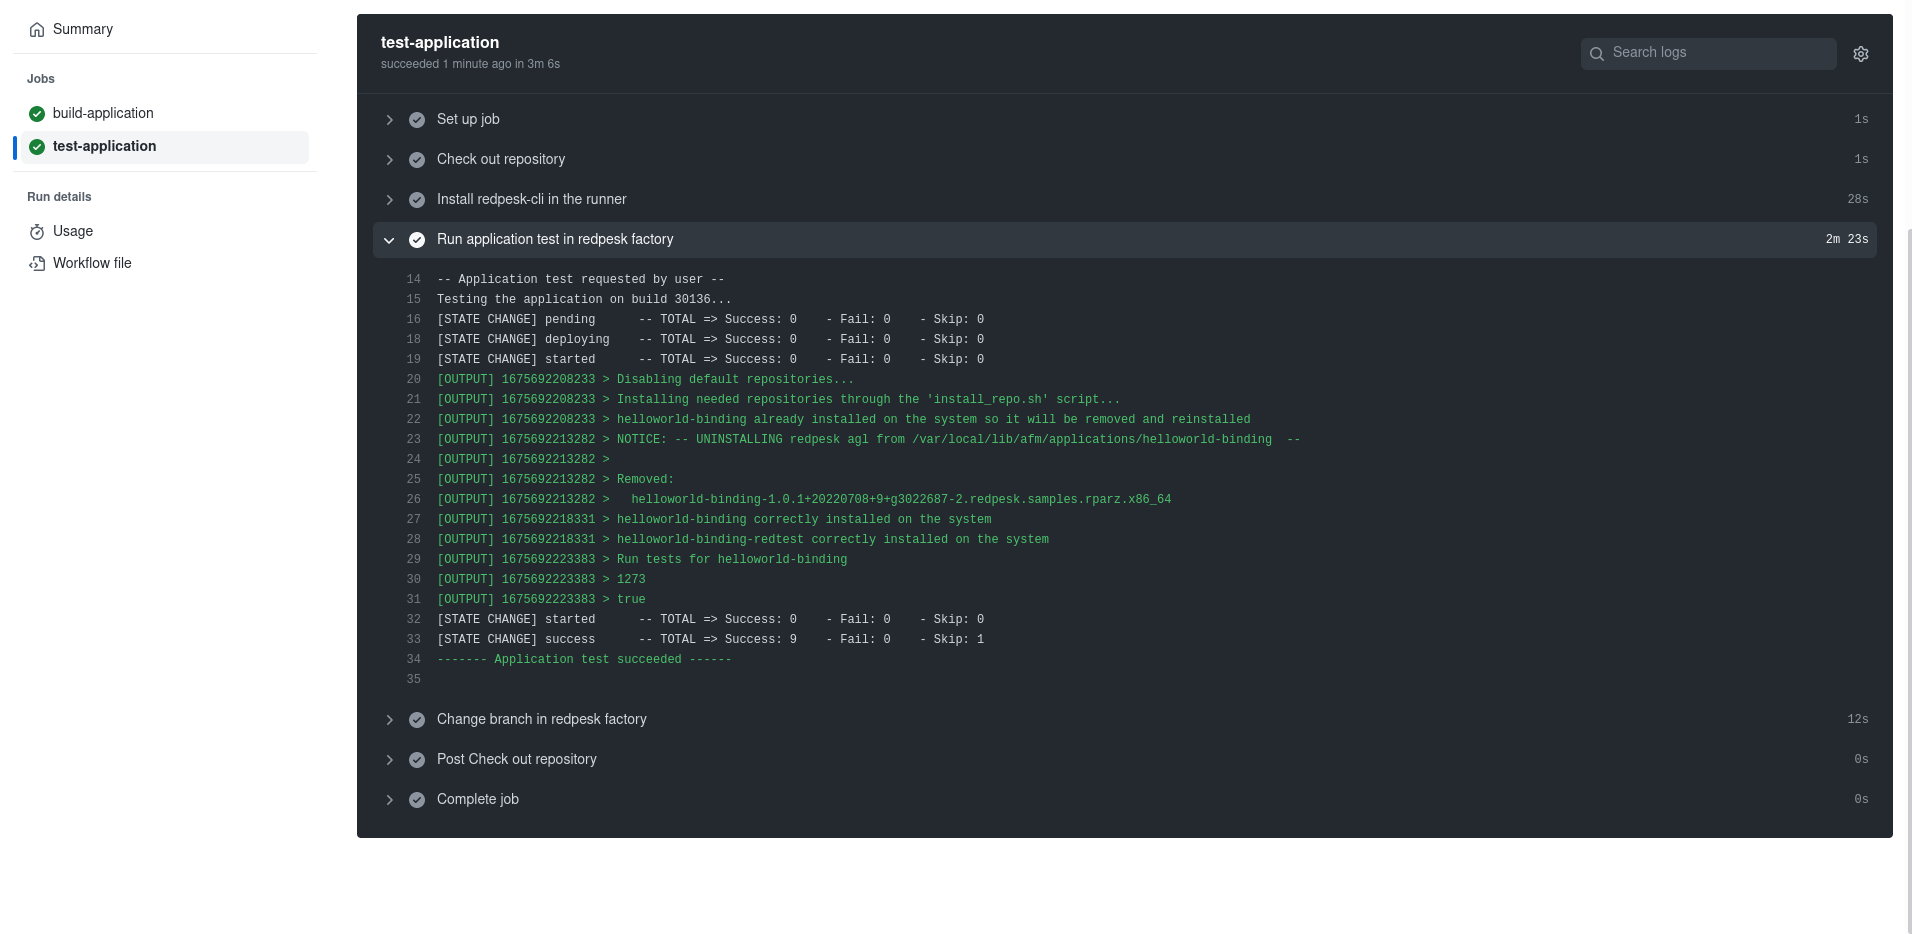
- name: Run application test in redpesk factory
run: rp-cli applications test "$RP_FACTORY_APP" -p "$RP_FACTORY_PROJECT" --comment "[Github CI] Started for PR '$GH_PR_NUMBER', from author '$GH_AUTHOR'" -v
- name: Change branch in redpesk factory
if: ${{ always() }}
run: rp-cli applications update "$RP_FACTORY_APP" -p "$RP_FACTORY_PROJECT" --source-rev "$GH_TARGET_BRANCH"
At the beginning, the line on: [pull_request, workflow_dispatch] specifies that the workflow is played on pull request.
The workflow_dispatch event allows the manual triggering of this workflow, which can be convenient during the set-up. For more information about manual triggers, please refers to the GitHub doc..
Then, the env block defines the variables used later in the workflow.
It can be seen that a secret is used for the token. Details are given about the process to follow for the secret use in this paragraph.
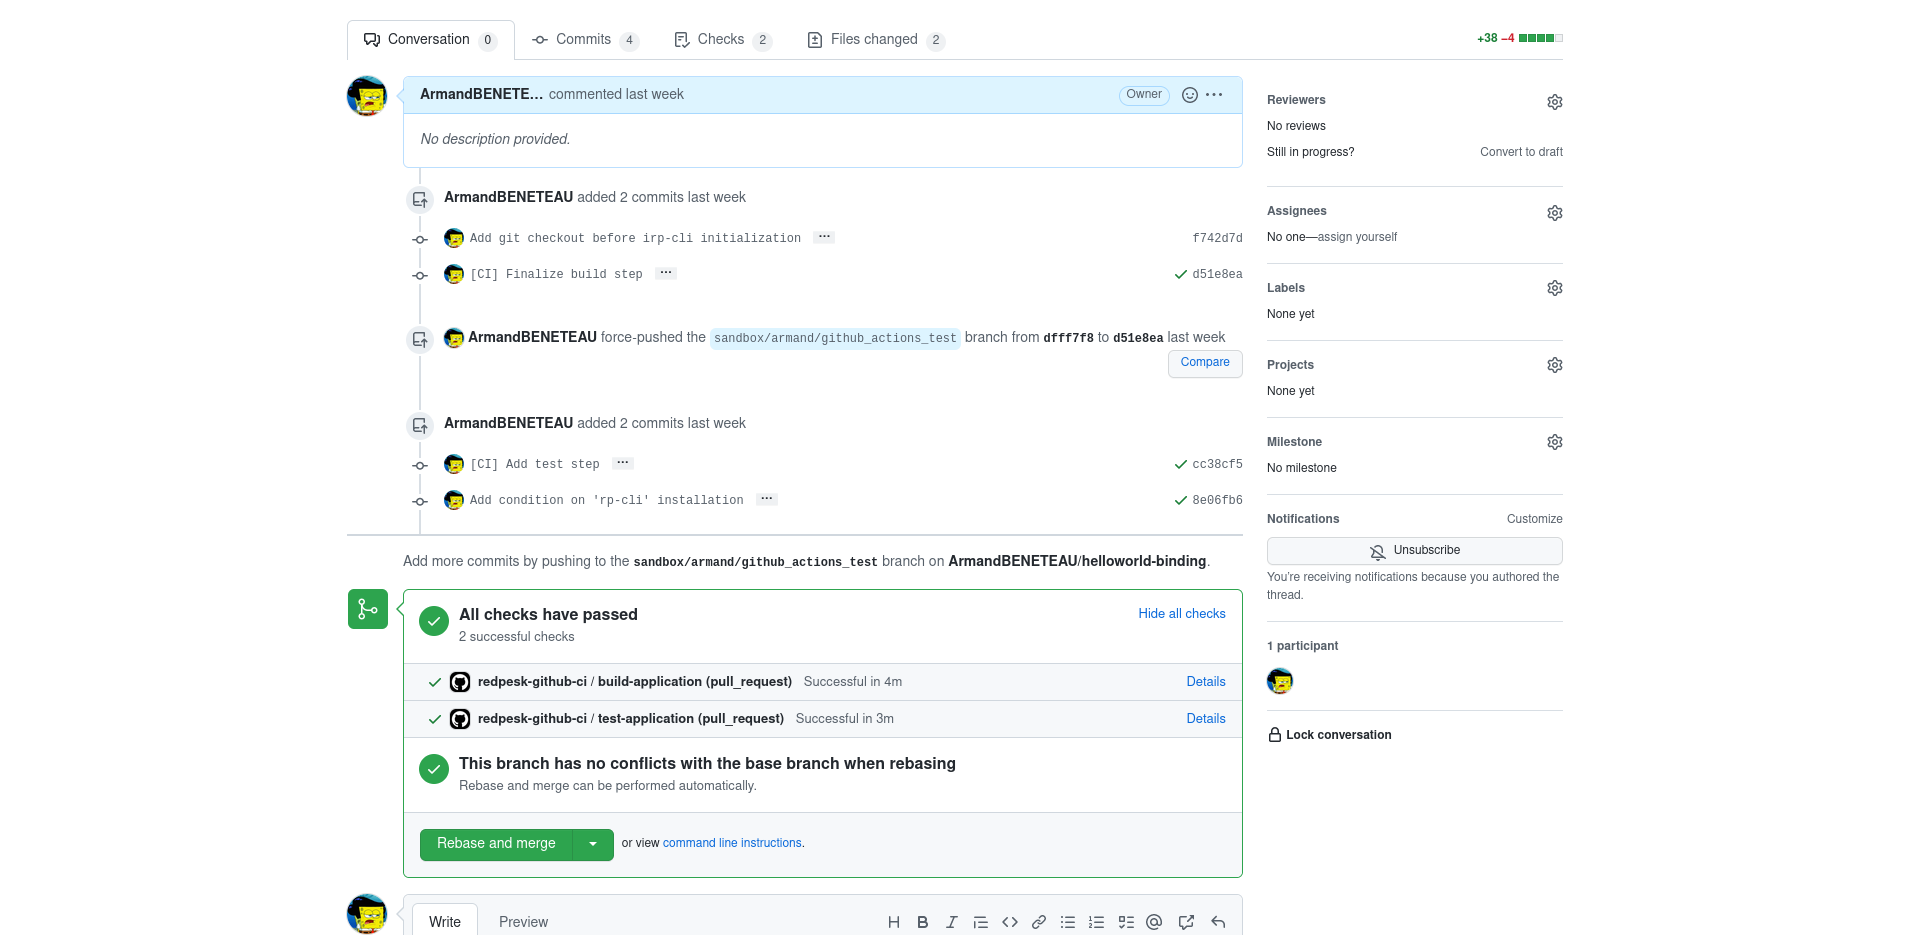
Finally, the jobs block defines the build-application and test-application jobs that need to be run on a merge request.
You can directly use this template as it is for your application. The only 2 things to change are the following variables (under env block).
-
RP_FACTORY_APP- Description: Slug of the application in the redpesk factory
-
Example value:
helloworld-binding
-
RP_FACTORY_PROJECT- Description: Slug of the project in the redpesk factory
-
Example value:
github-ci-project
Set-up with redpesk factory hosted runner(s)
If you have your On-Premise factory, Iot.bzh can set-up for you a GitHub Actions runner inside your redpesk factory. This allows you to have unlimited CI time.
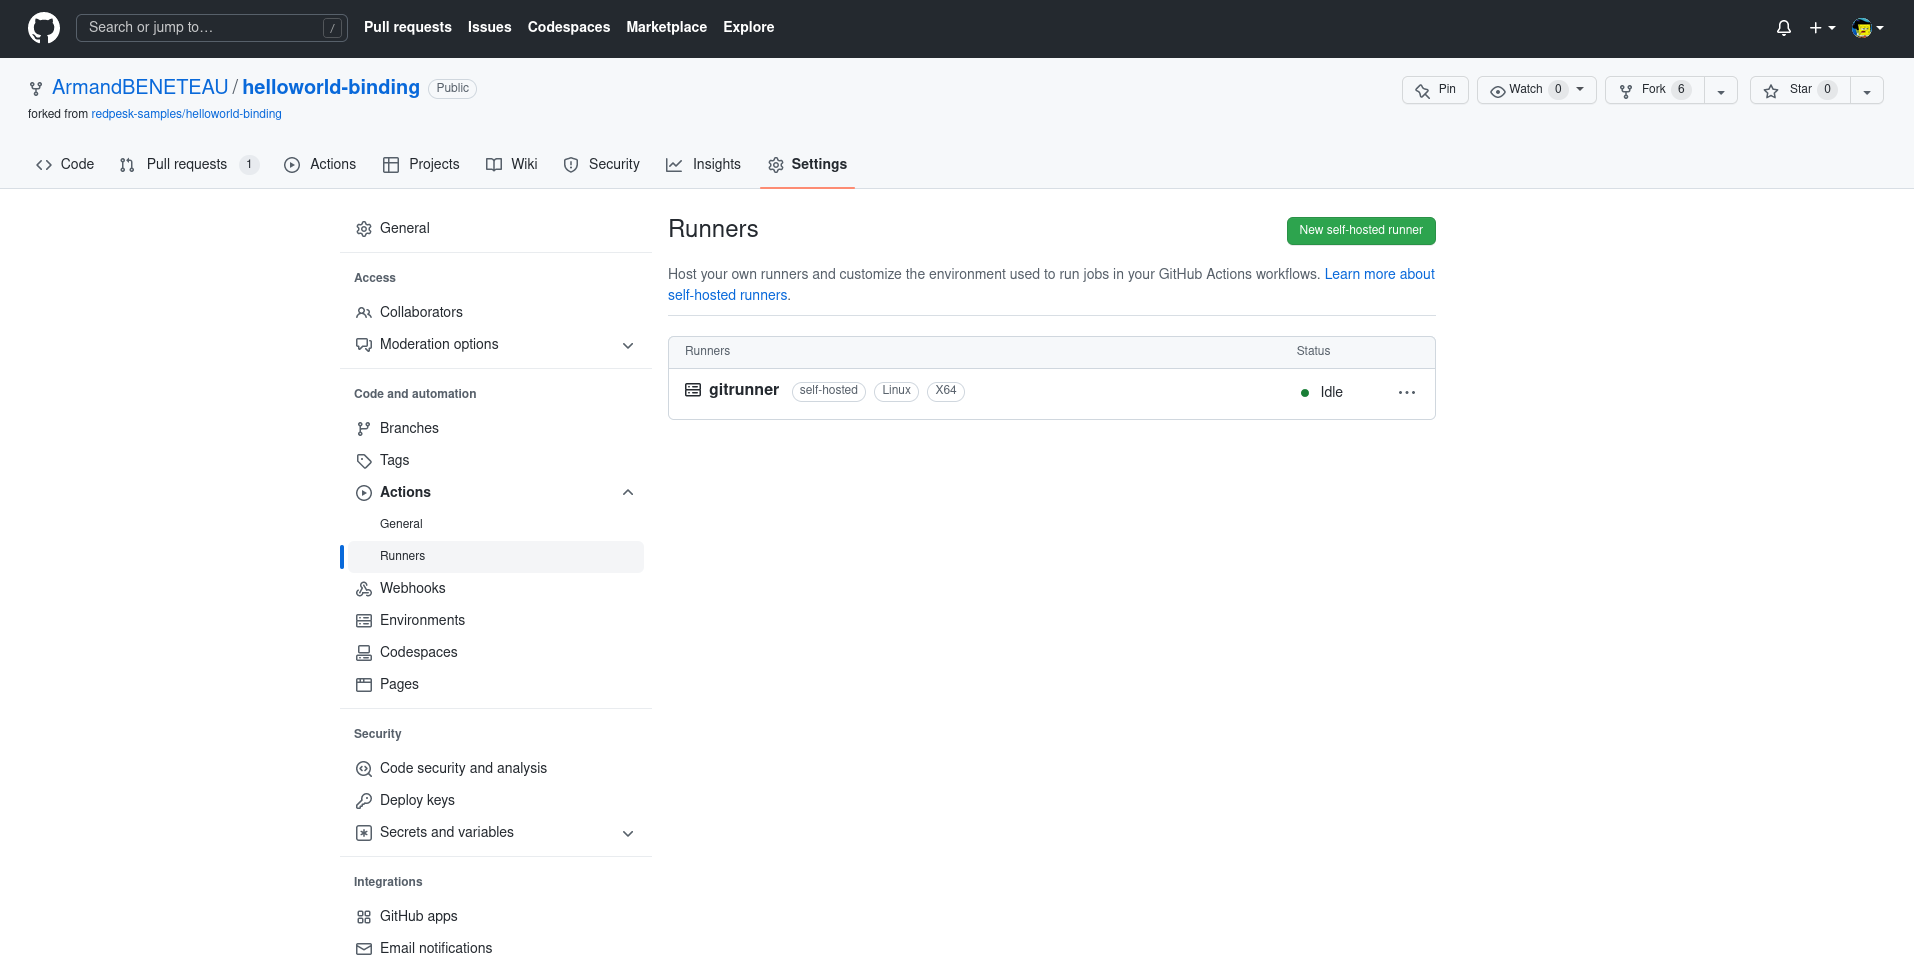
Once the CI runner is registered, with rp-cli installed, you will be able to find it under the Settings of your repository (or organization), under Actions/Runners.
It is now time to create your workflow. For this, in your application repository on github.com, create the following directories .github/workflows/ at the root.
Then, under .github/workflows/, create the following redpesk-github-ci.yml file.
name: redpesk-github-ci
run-name: ${{ github.actor }} has started a Github action
on: [pull_request, workflow_dispatch]

env:
  RP_FACTORY_PROJECT: 'github-ci-project'
  RP_FACTORY_APP: 'helloworld-binding'
  GH_SOURCE_BRANCH: ${{ github.head_ref }}
  GH_TARGET_BRANCH: ${{ github.base_ref }}
  GH_AUTHOR: ${{ github.actor }}
  GH_PR_NUMBER: ${{ github.event.pull_request.number }}

jobs:
  build-application:
    runs-on: self-hosted
    steps:
      - name: Change branch in factory to source branch
        run: rp-cli applications update "$RP_FACTORY_APP" -p "$RP_FACTORY_PROJECT" --source-rev "$GH_SOURCE_BRANCH"

      - name: Run application build in redpesk factory
        run: rp-cli applications build "$RP_FACTORY_APP" -p "$RP_FACTORY_PROJECT" --comment "[Github CI] Started for PR '$GH_PR_NUMBER', from author '$GH_AUTHOR'"

      - name: Handle possible failure
        if: ${{ failure() }}
        run: rp-cli applications update "$RP_FACTORY_APP" -p "$RP_FACTORY_PROJECT" --source-rev "$GH_TARGET_BRANCH"

  test-application:
    runs-on: self-hosted
    needs: build-application
    steps:
      - name: Run application test in redpesk factory
        run: rp-cli applications test "$RP_FACTORY_APP" -p "$RP_FACTORY_PROJECT" --comment "[Github CI] Started for PR '$GH_PR_NUMBER', from author '$GH_AUTHOR'" -v

      - name: Change branch in redpesk factory
        if: ${{ always() }}
        run: rp-cli applications update "$RP_FACTORY_APP" -p "$RP_FACTORY_PROJECT" --source-rev "$GH_TARGET_BRANCH"
At the beginning, the line on: [pull_request, workflow_dispatch] specifies that the workflow is played on pull request.
The workflow_dispatch event allows the manual triggering of this workflow, which can be convenient during set-up. For more information about manual triggers, please refers to the GitHub doc..
Then, the env block defines the variables used later in the workflow.
Finally, the jobs block defines the build-application and test-application jobs that need to be run on a merge request.
You can directly use this template as it is for your application. The only 2 things to change are the following variables (under env block).
-
RP_FACTORY_APP- Description: Slug of the application in the redpesk factory
-
Example value:
helloworld-binding
-
RP_FACTORY_PROJECT- Description: Slug of the project in the redpesk factory
-
Example value:
github-ci-project
Secret creation from redpesk token
The official GitHub Actions documentation about secret can be found here.
In this paragraph, we will show how to quickly set-up this secret in order to make our workflow work.
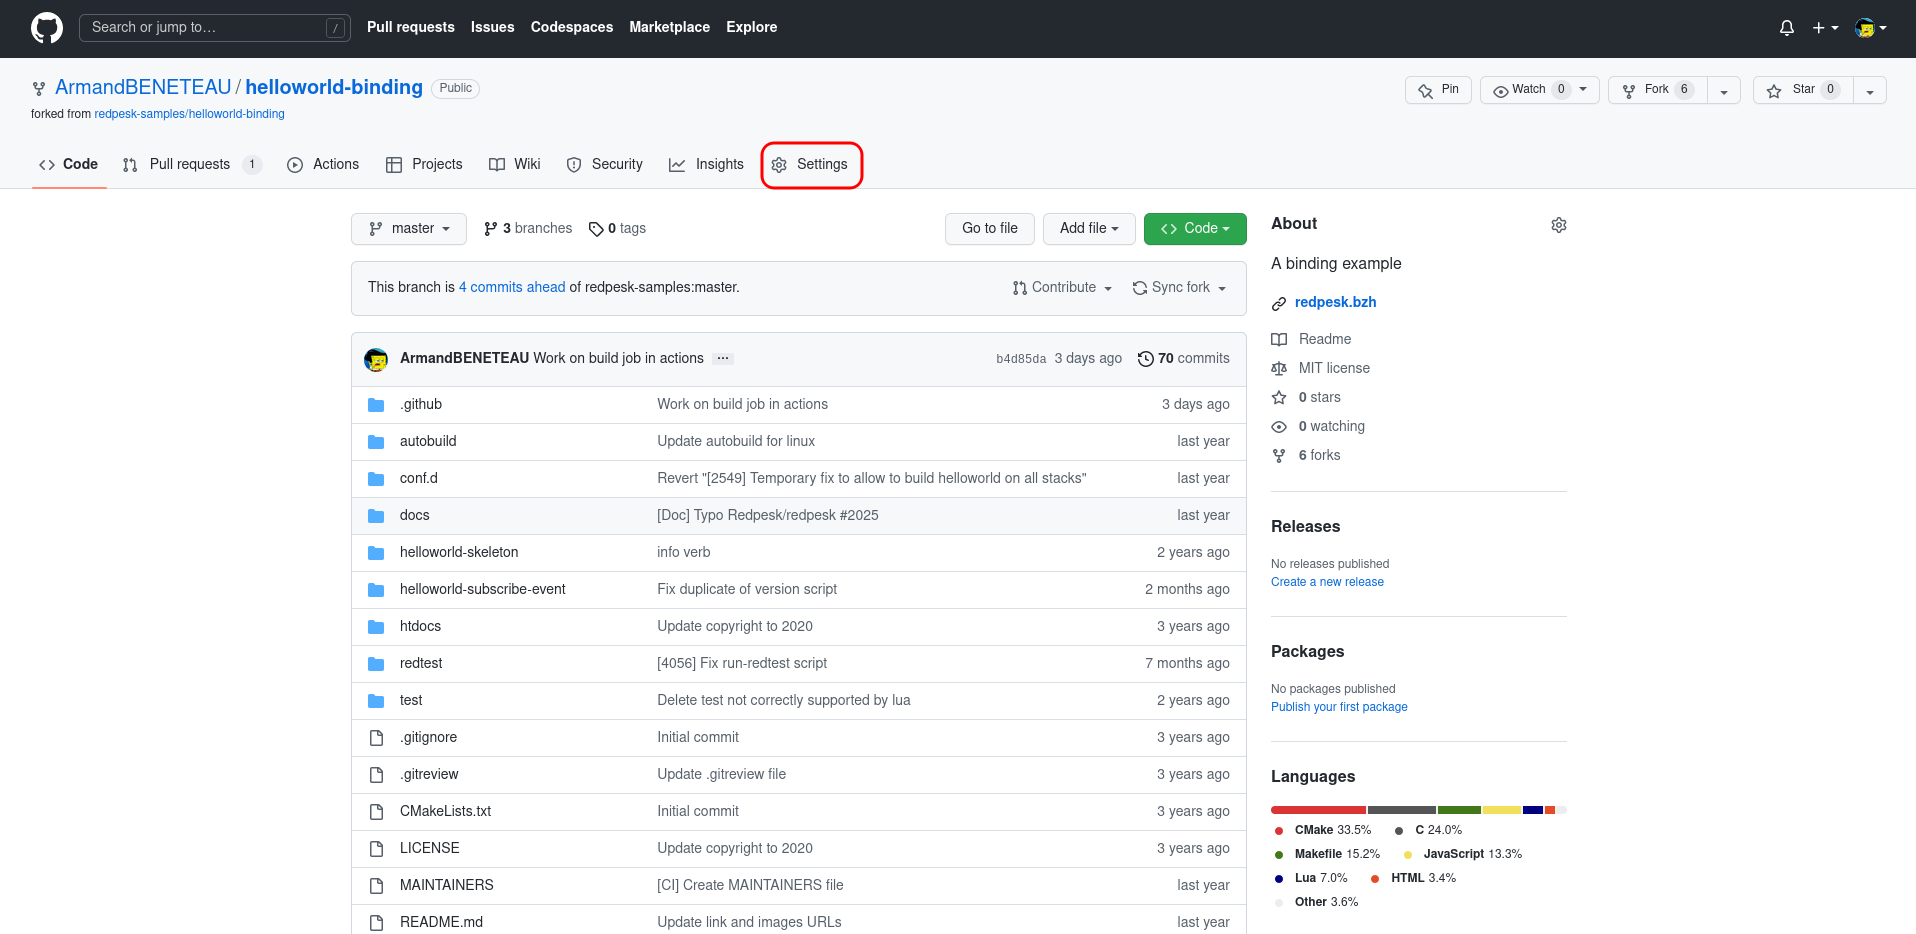
In the home page of your repository click on “Settings”.
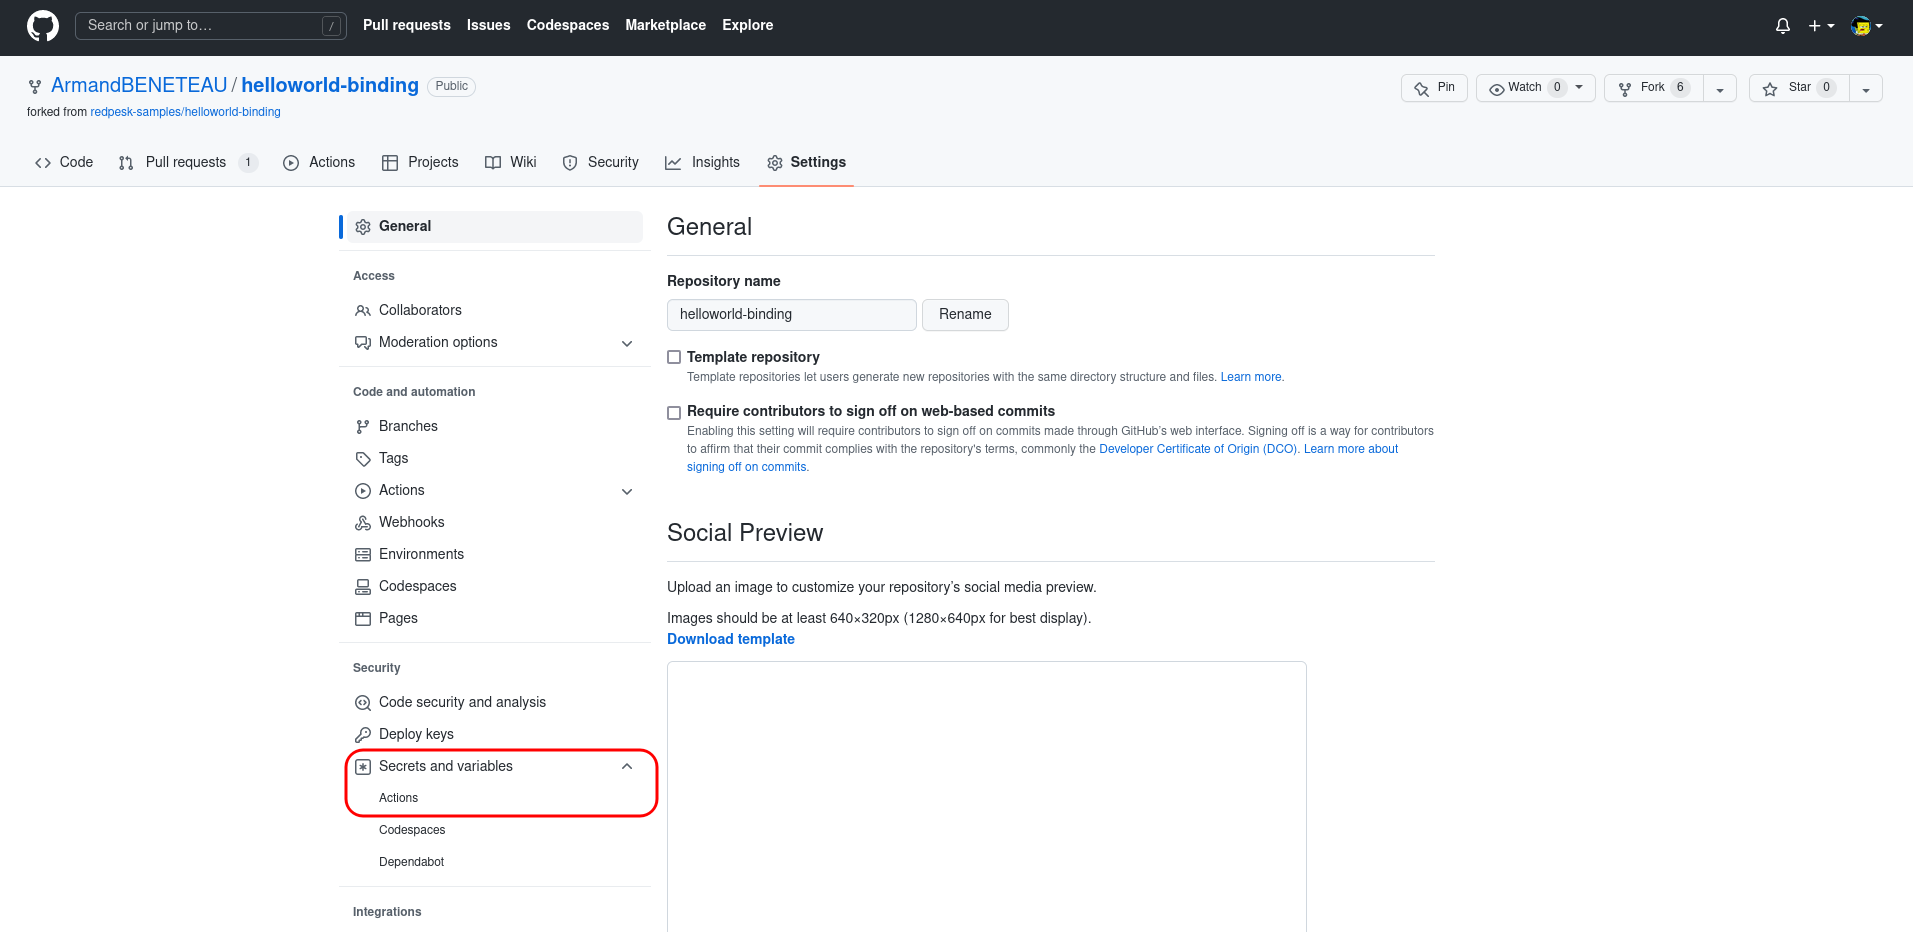
Once on the settings page, go to “Secrets and variables” > “Actions”.
After that, click on the green button named “New repository secret”.
In order to match the name we used in our template, name this secret RP_REMOTE_FACTORY_TOKEN.
The value of this secret is the one that can be obtained on the redpesk factory webUI. Click here for more information.
Pull request settings
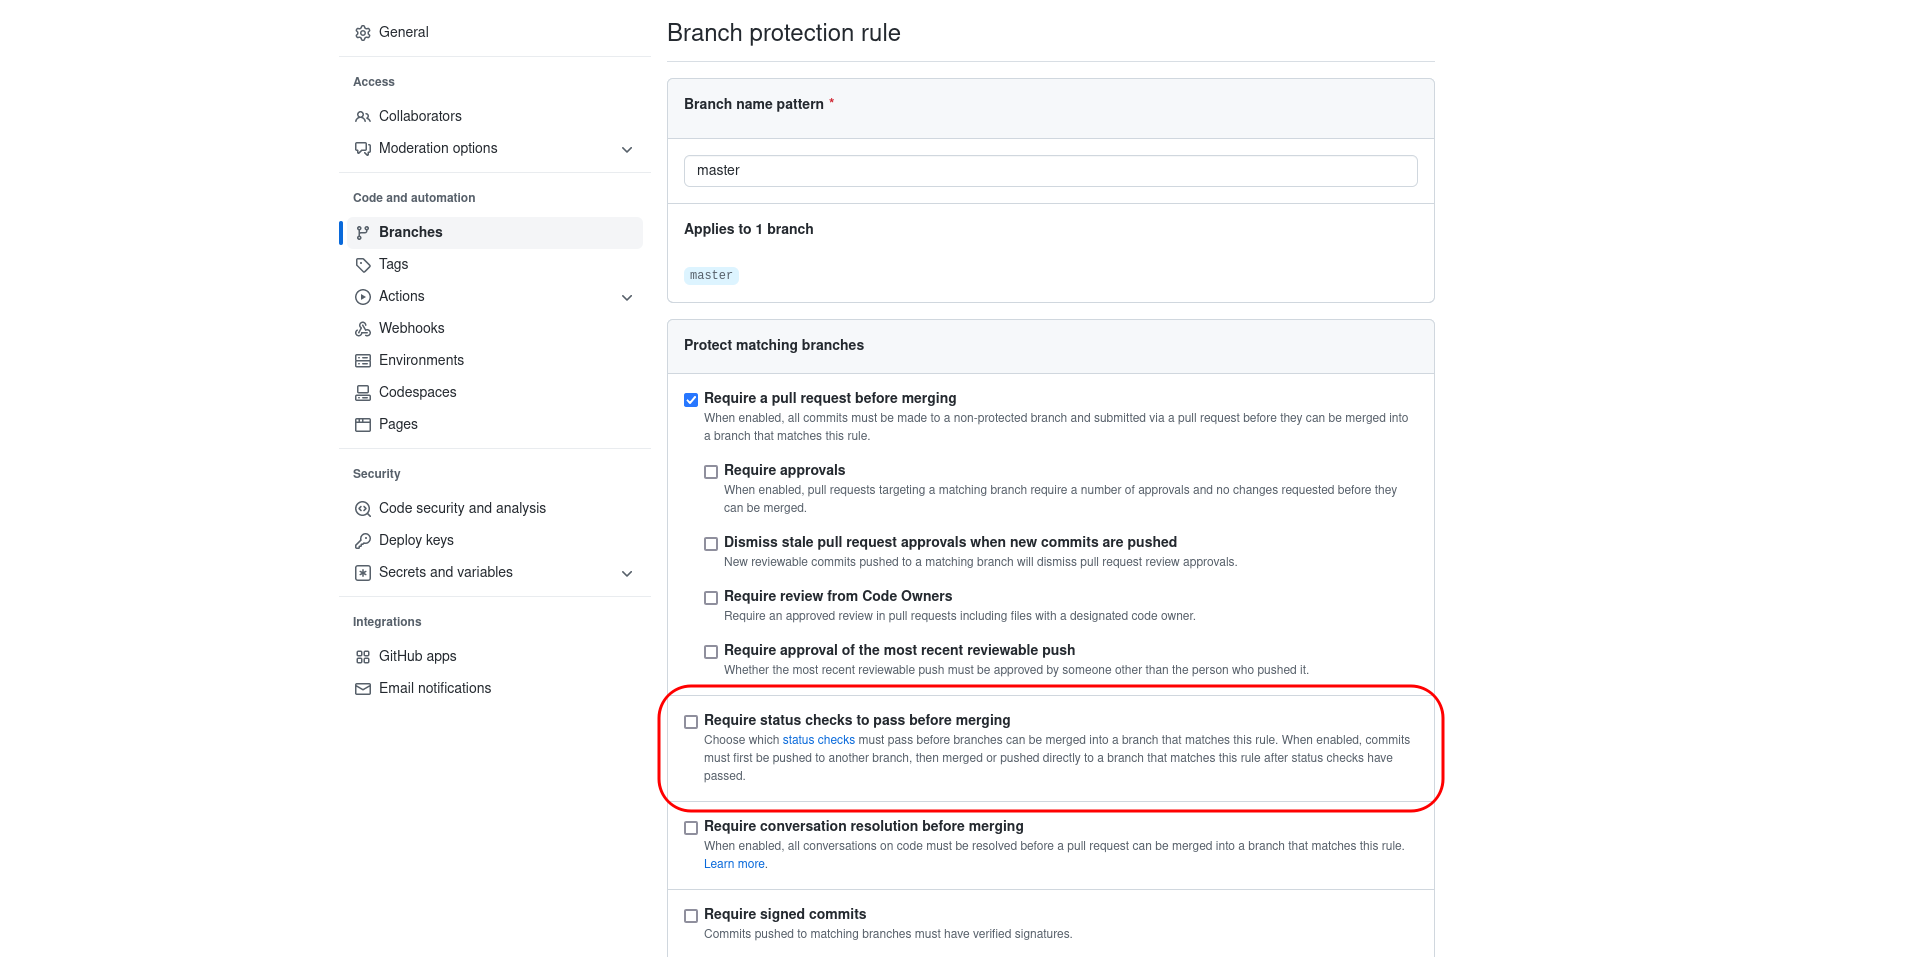
If the success of the workflow is mandatory to merge the pull request, you need to enable the “Require status checks to pass before merging” option for each target branch concerned.
In order to do that, click on the “Settings” section of your repository and then on “Branches”. Here, under “Branch protection rules”, click on “Edit” for the branch(es) you want to protect.
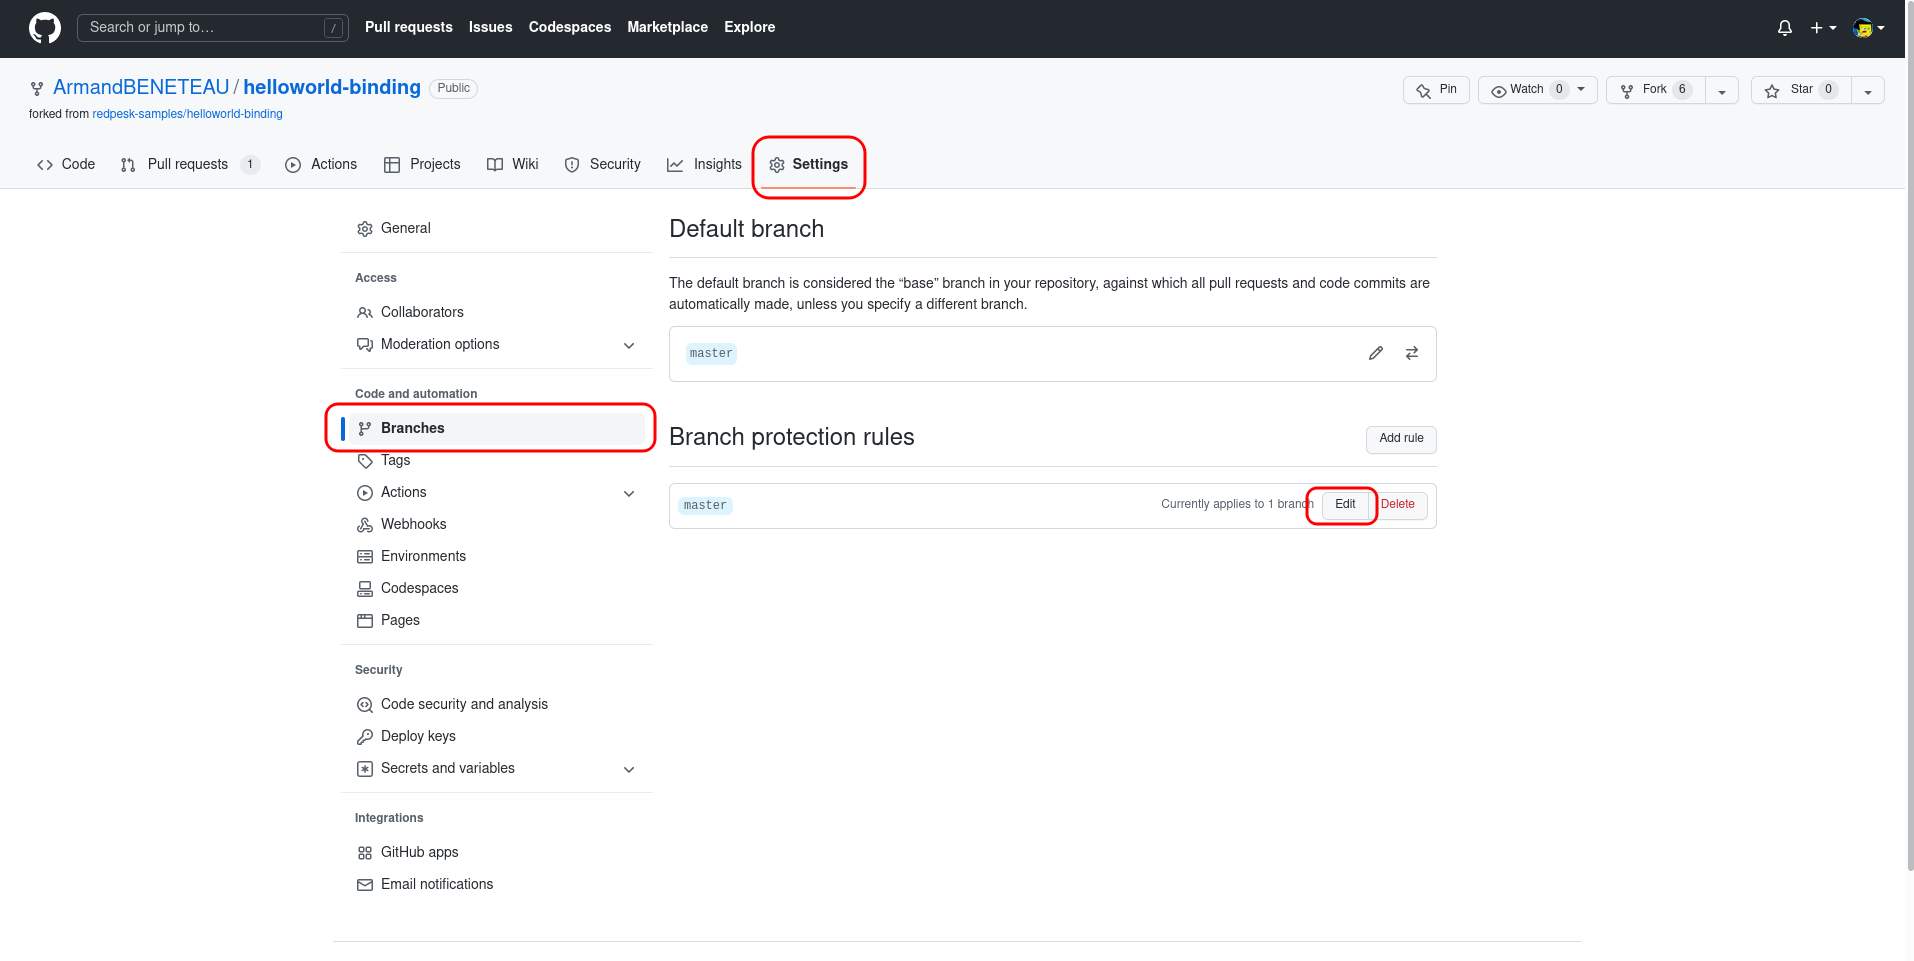
Finally check the “Require status checks to pass before merging” case.
Enjoy your GitHub Actions set-up