Gitlab CI
The goal of this chapter is to demonstrate the possibility for a Gitlab instance to interact with our redpesk factory.
In order to do that, we will take the following example: we want to trigger an automatic build and test of an application, on a merge request opening in the GIT repository of this application. If a problem appears in the build or in the test, the merge request is “blocked” and cannot be merged. This allows the maintainer of the application to have a first automatic check that the new code added by the merge request does not lead to regressions.
Gitlab environment
For this example we assume that our applications are hosted on gitlab.com. Each “application” corresponds to a Gitlab project and they are under the same group.
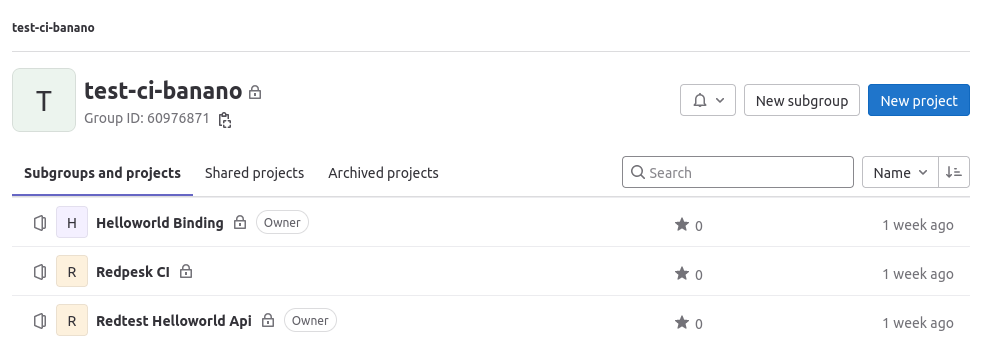
In this example, we can see that 3 Gitlab projects exist:
- “Helloworld Binding”: the famous one, coming from redpesk OS (sources available here)
- “Redpesk CI: this project will be used to store the common CI configurations, potentially used by all the projects of the group
- “Redtest Helloworld Api”: another application that can be built and tested in the redpesk factory (sources available here)
redpesk factory set-up
On the redpesk factory side, the corresponding applications have been created. Each application URL points to the corresponding Gitlab project seen in the previous paragraph.

Additional applications are present (starting with “python3”). They are, in fact, dependencies necessary to run “redtest-helloworld-api” tests.
Before going any further, make sure that the build and the test of your applications are successful on the branch you have chosen.
Gitlab group set-up
In this paragraph we can have two cases. If you are using the redpesk community factory (https://community-app.redpesk.bzh) and the public Gitlab instance you will have to use the gitlab.com CI runners so please refer to the first paragraph. If you have your On-Premise redpesk factory you can have a dedicated Gitlab CI runner in your factory, then, please refer to the second paragraph.
NOTE:
keep in mind that gitlab.com limits the CI/CD time per month for free users (cf. https://about.gitlab.com/pricing/).
Having your own runner can be a way of having unlimited CI/CD time. If you want to have your own redpesk factory and/or your own CI runner(s), feel free to contact us.
Set-up with gitlab.com CI runner(s)
In the project Redpesk CI in your Gitlab group, add the .before_after_scripts_ci.yml file.
# IoT.bzh Company - redpesk
#
# This file is a generic file containing the script to be played before and after each job.
# This allows one to manage these scripts in a unique file
#
# In order to work correctly, this file needs to be included in the '.gitlab-ci.yml' file
# of the project.
#
# For more information please refer to:
#    - https://docs.gitlab.com/ee/ci/yaml/includes.html#use-default-configuration-from-an-included-configuration-file
#

# Set-up the different variables needed by the pipeline
variables:
    RP_INSTALL_RPCLI_URL: "https://raw.githubusercontent.com/redpesk-devtools/redpesk-sdk-tools/refs/heads/master/install-redpesk-cli.sh"

default:
  # Use a Fedora 40 docker image (compatible to use rp-cli in it)
  image: fedora:40

  # Define the "before script" to use by default
  before_script:
    # Install `rp-cli` since we are in an empty docker
    - dnf install -y curl && curl -s "$RP_INSTALL_RPCLI_URL" | bash -s -- --no-recommends
    - rp-cli connections add "$RP_REMOTE_FACTORY_NAME" --url "$RP_REMOTE_FACTORY_URL" --token "$RP_REMOTE_FACTORY_TOKEN"
    - rp-cli connections use "$RP_REMOTE_FACTORY_NAME"

  # Define the "after script" to use by default
  after_script:
    - >
        if ([ $CI_JOB_STATUS == 'success' ] && [ $CI_JOB_STAGE == 'test' ]) || [ $CI_JOB_STATUS == 'failed' ] || [ $CI_JOB_STATUS == 'canceled' ]; then
          rp-cli applications update "$RP_FACTORY_APP" -p "$RP_FACTORY_PROJECT" --source-rev "$CI_MERGE_REQUEST_TARGET_BRANCH_NAME"
        fi
Firstly, this file allows one to select a Fedora 40 Docker’s image, to install rp-cli in it and to configure it to talk with the redpesk factory you are using (more information about the environment variables used in the next paragraphs).
After the jobs, under certain conditions, this configuration allows the resetting of the application source revision to its original value (in the redpesk factory).
Set-up with redpesk factory CI runner(s)
If you have your own factory, Iot.bzh can set-up for you (or can show you how) a Gitlab CI runner inside your redpesk factory. This allows you to have unlimited CI time.
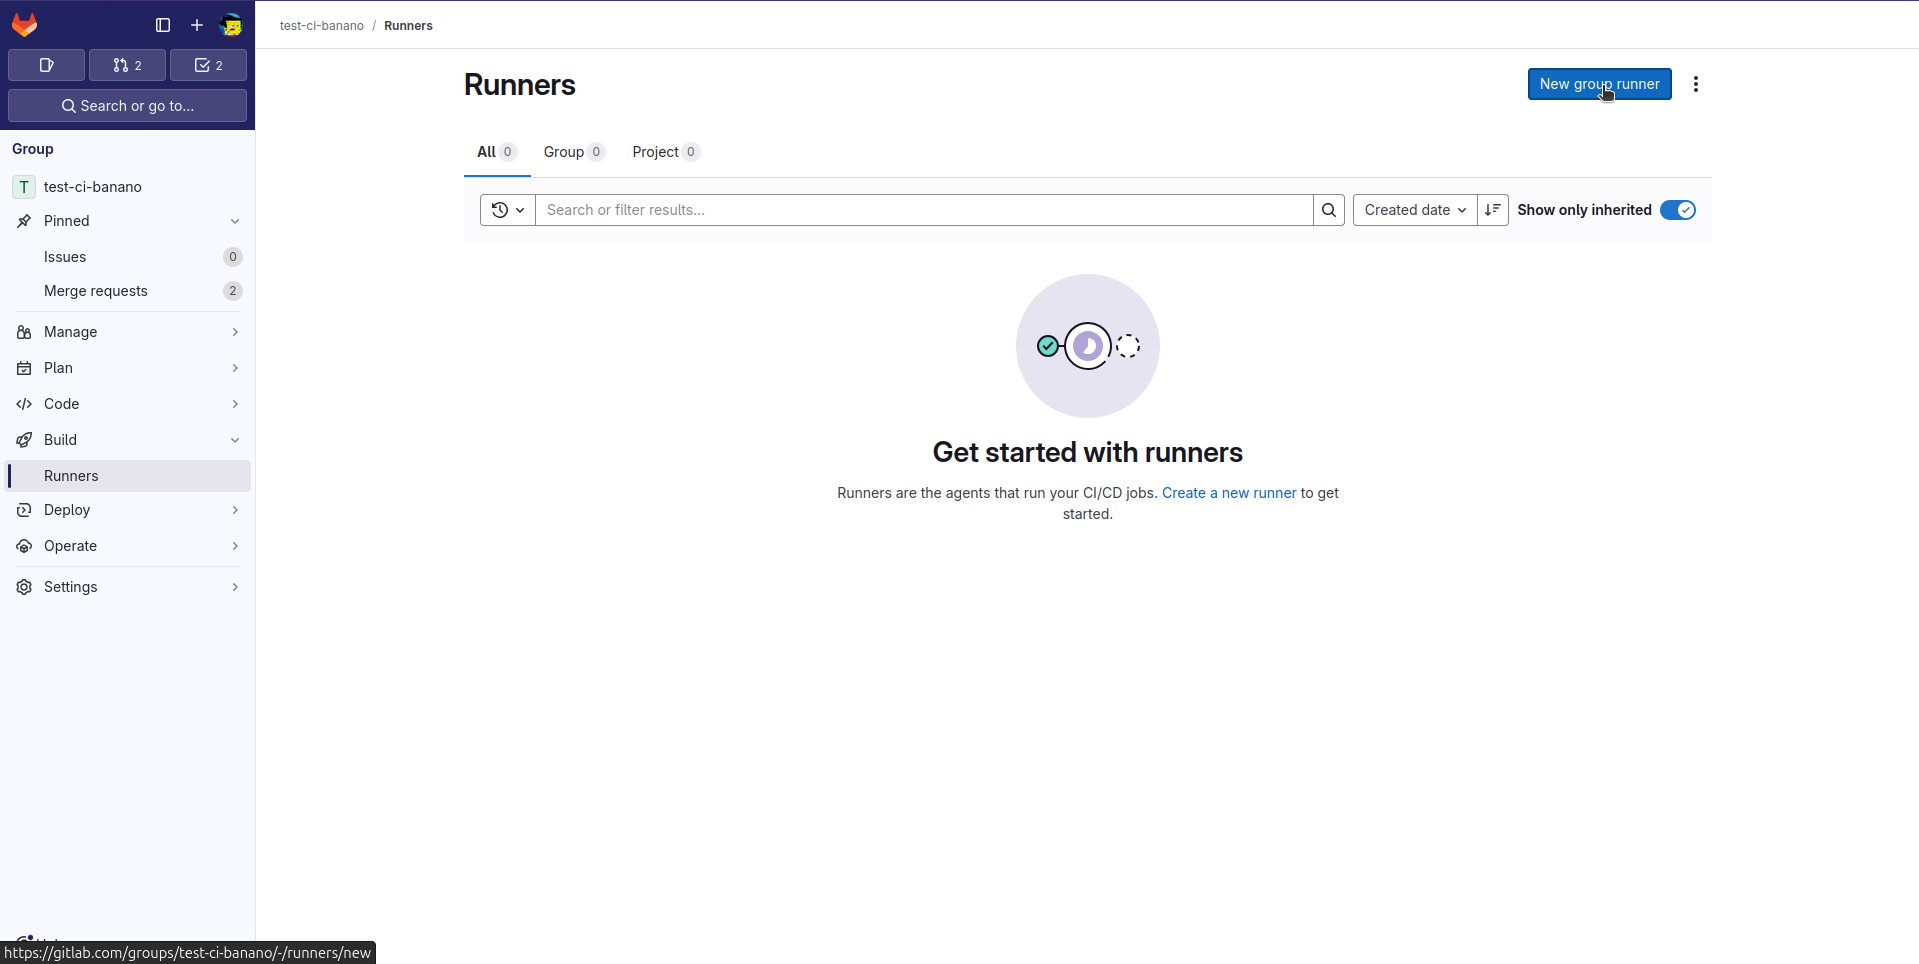
Once the runner is set-up, with rp-cli installed, you will need to add this runner in your Gitlab group. In order to do that, go under ‘Build’ tab of the Gitlab group and click on “Runners”.

Then, click on “New group runner” on the top right.
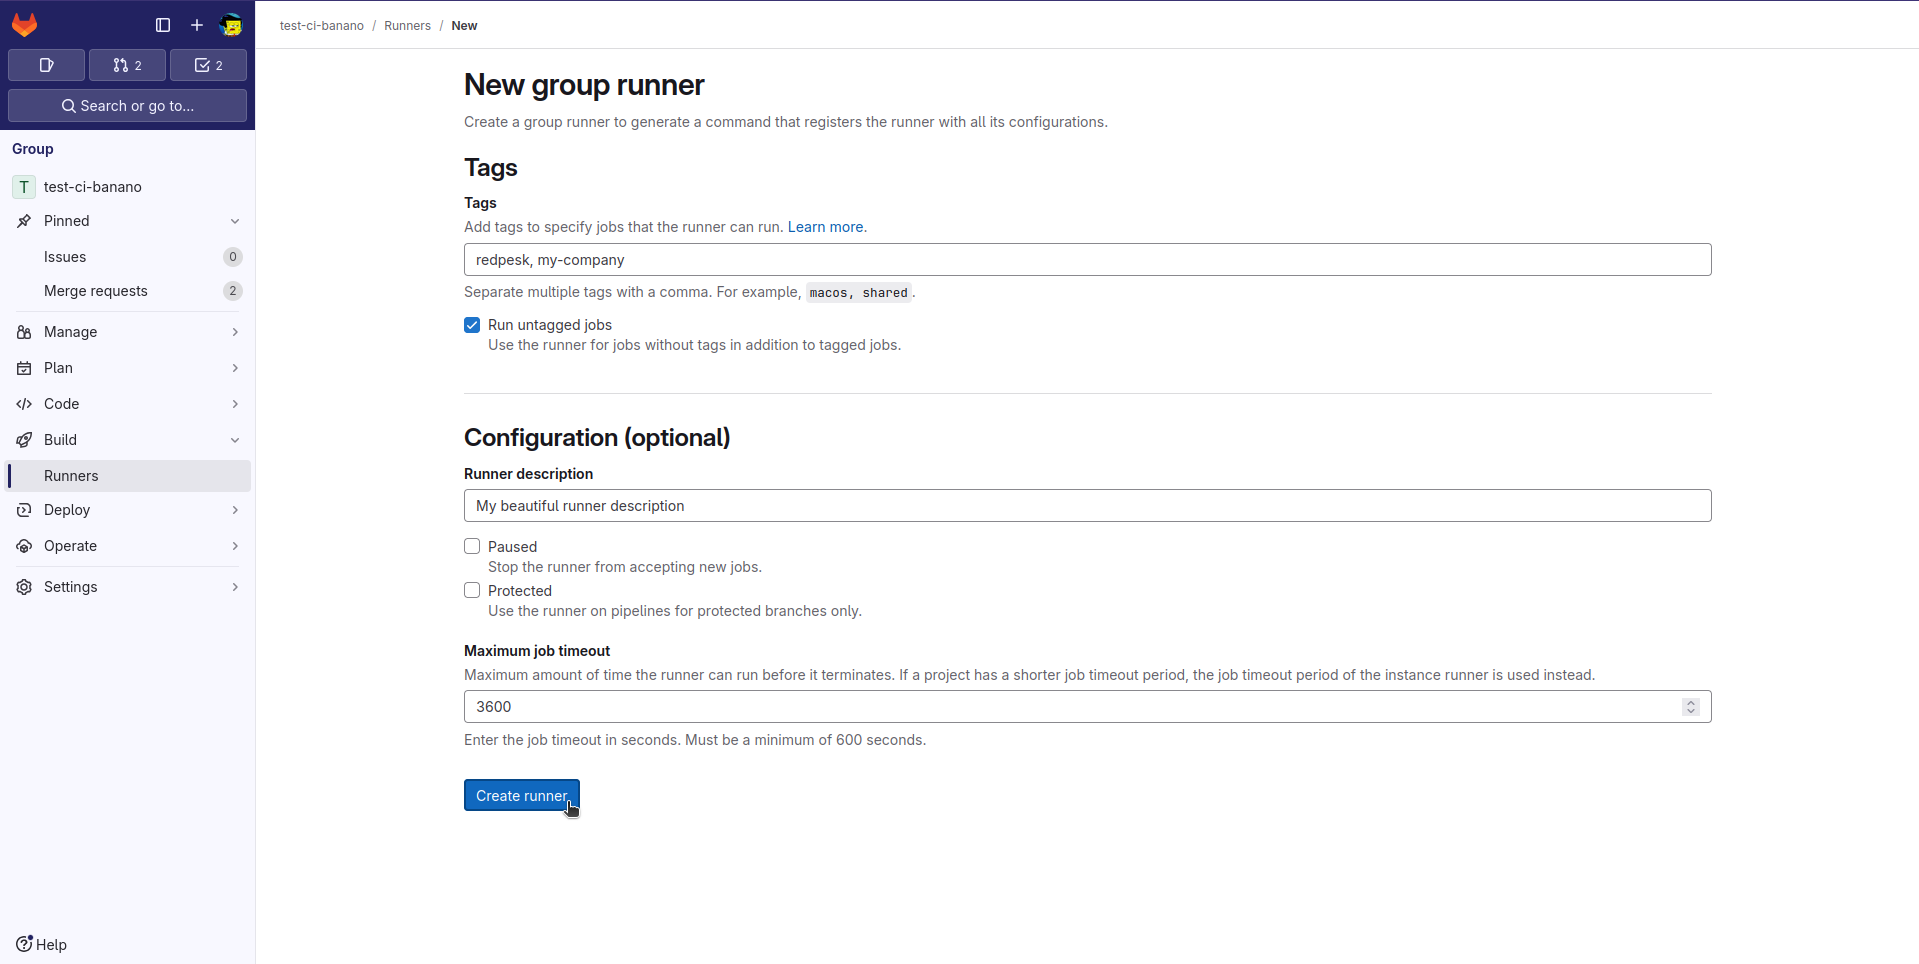
In the next page, you can specify the configuration you want for the runner: tags, if it can run untagged jobs, its job timeout, etc. When you are happy with the settings, click on “Create runner”.
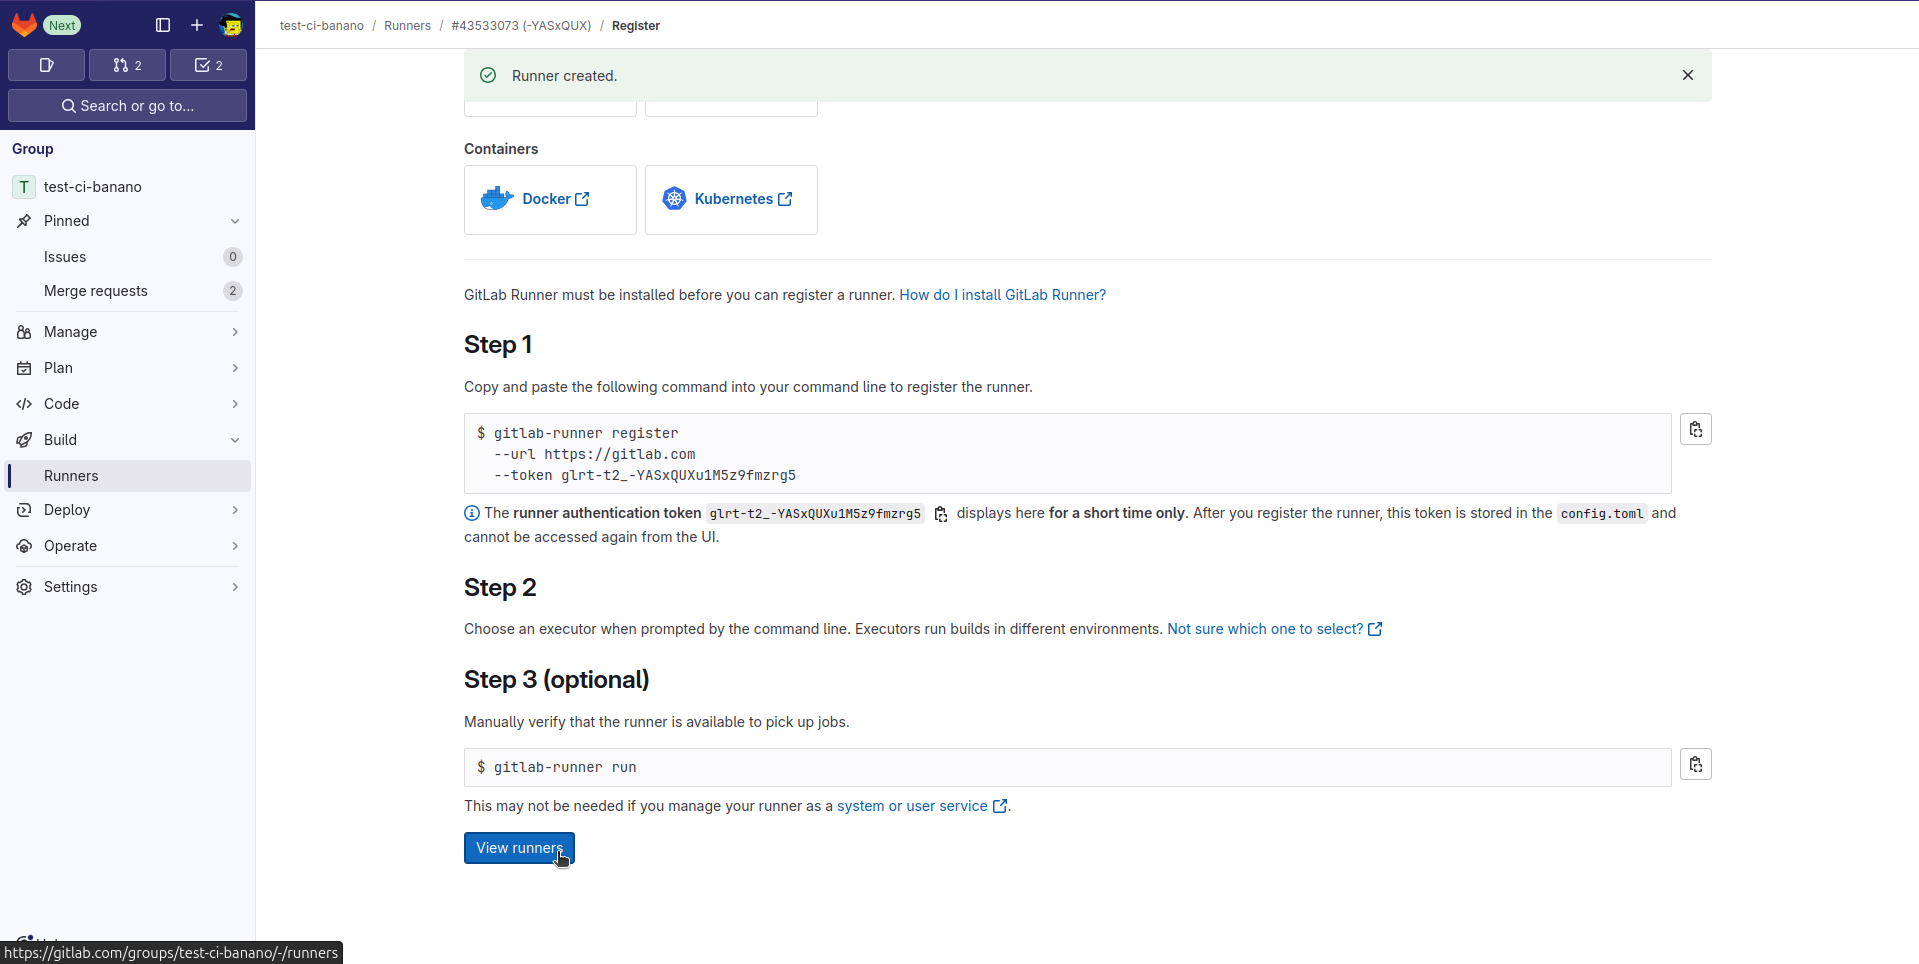
The runner is now created. Gitlab gives you the command to give the right token to your runner. Be sure to copy this command and to keep it somewhere until your runner is truly associated! Indeed this token is shown only here!
So if you have deployed yourself your runner, run this command in a prompt of this machine. If you have delegated the deployment to Iot.bzh, please send this command to us.

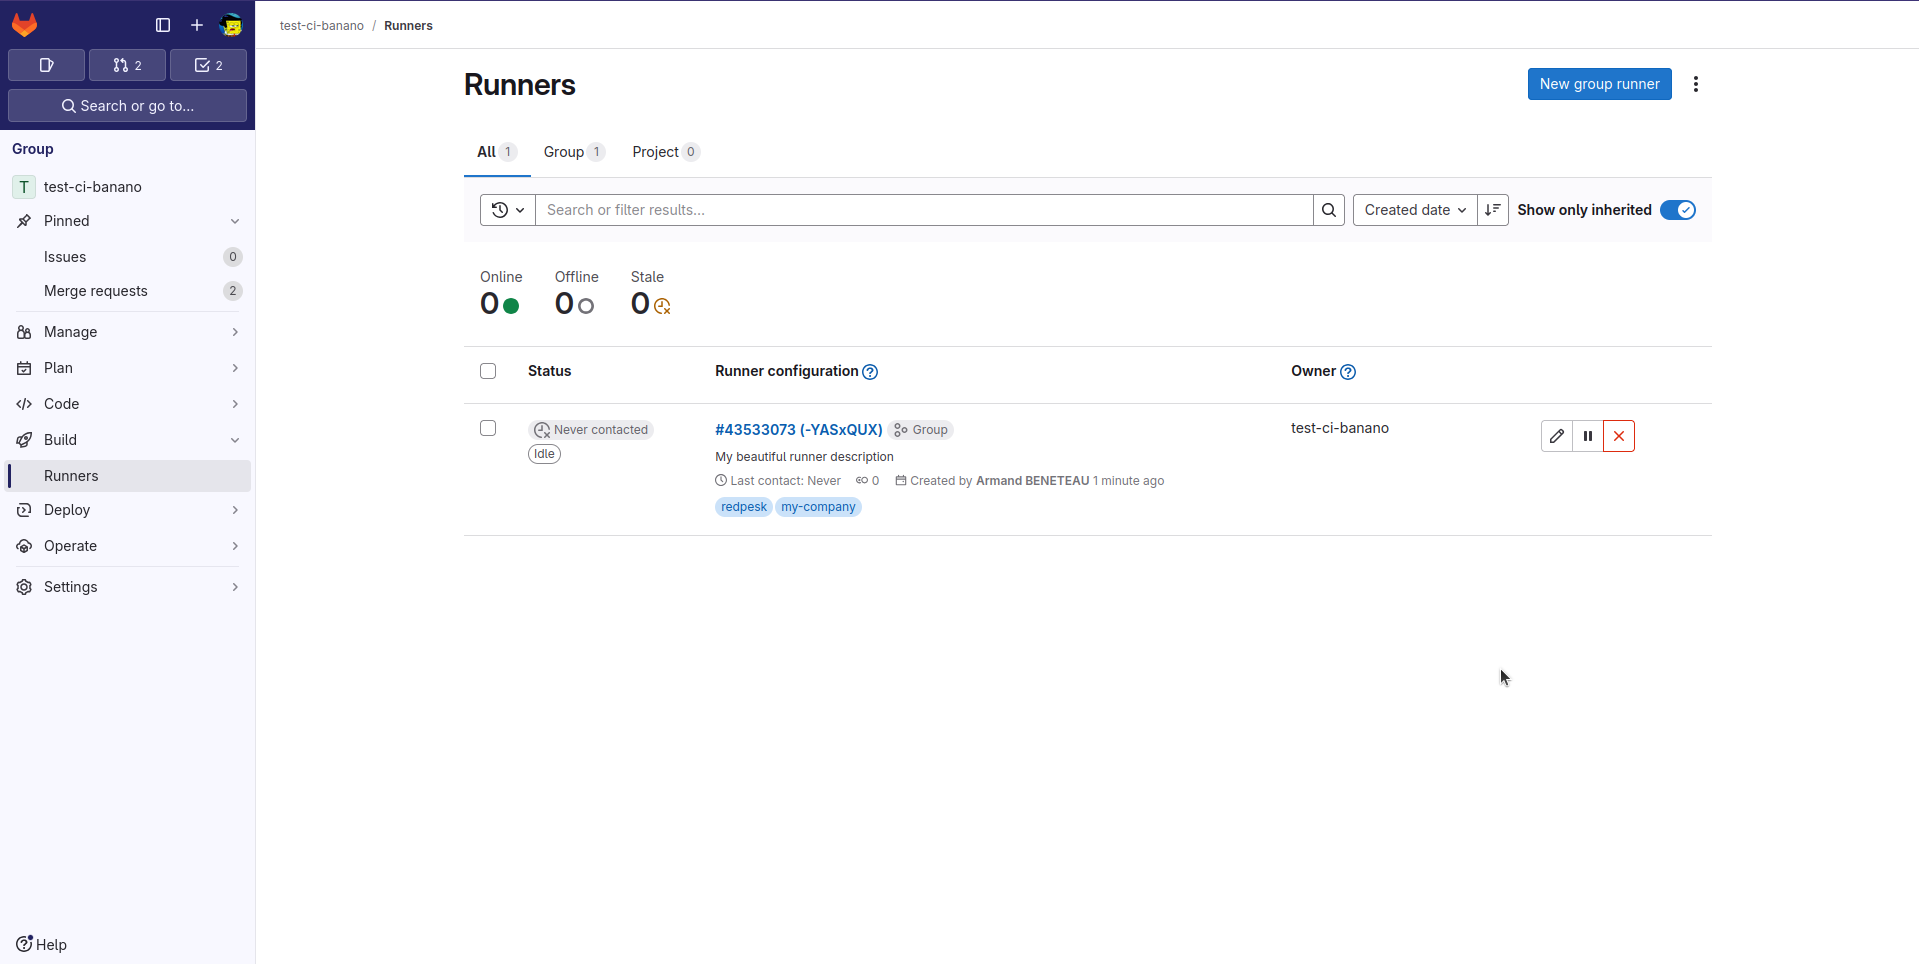
Then, click on the “View runners” button to get back to the list of runners available for your Gitlab group.
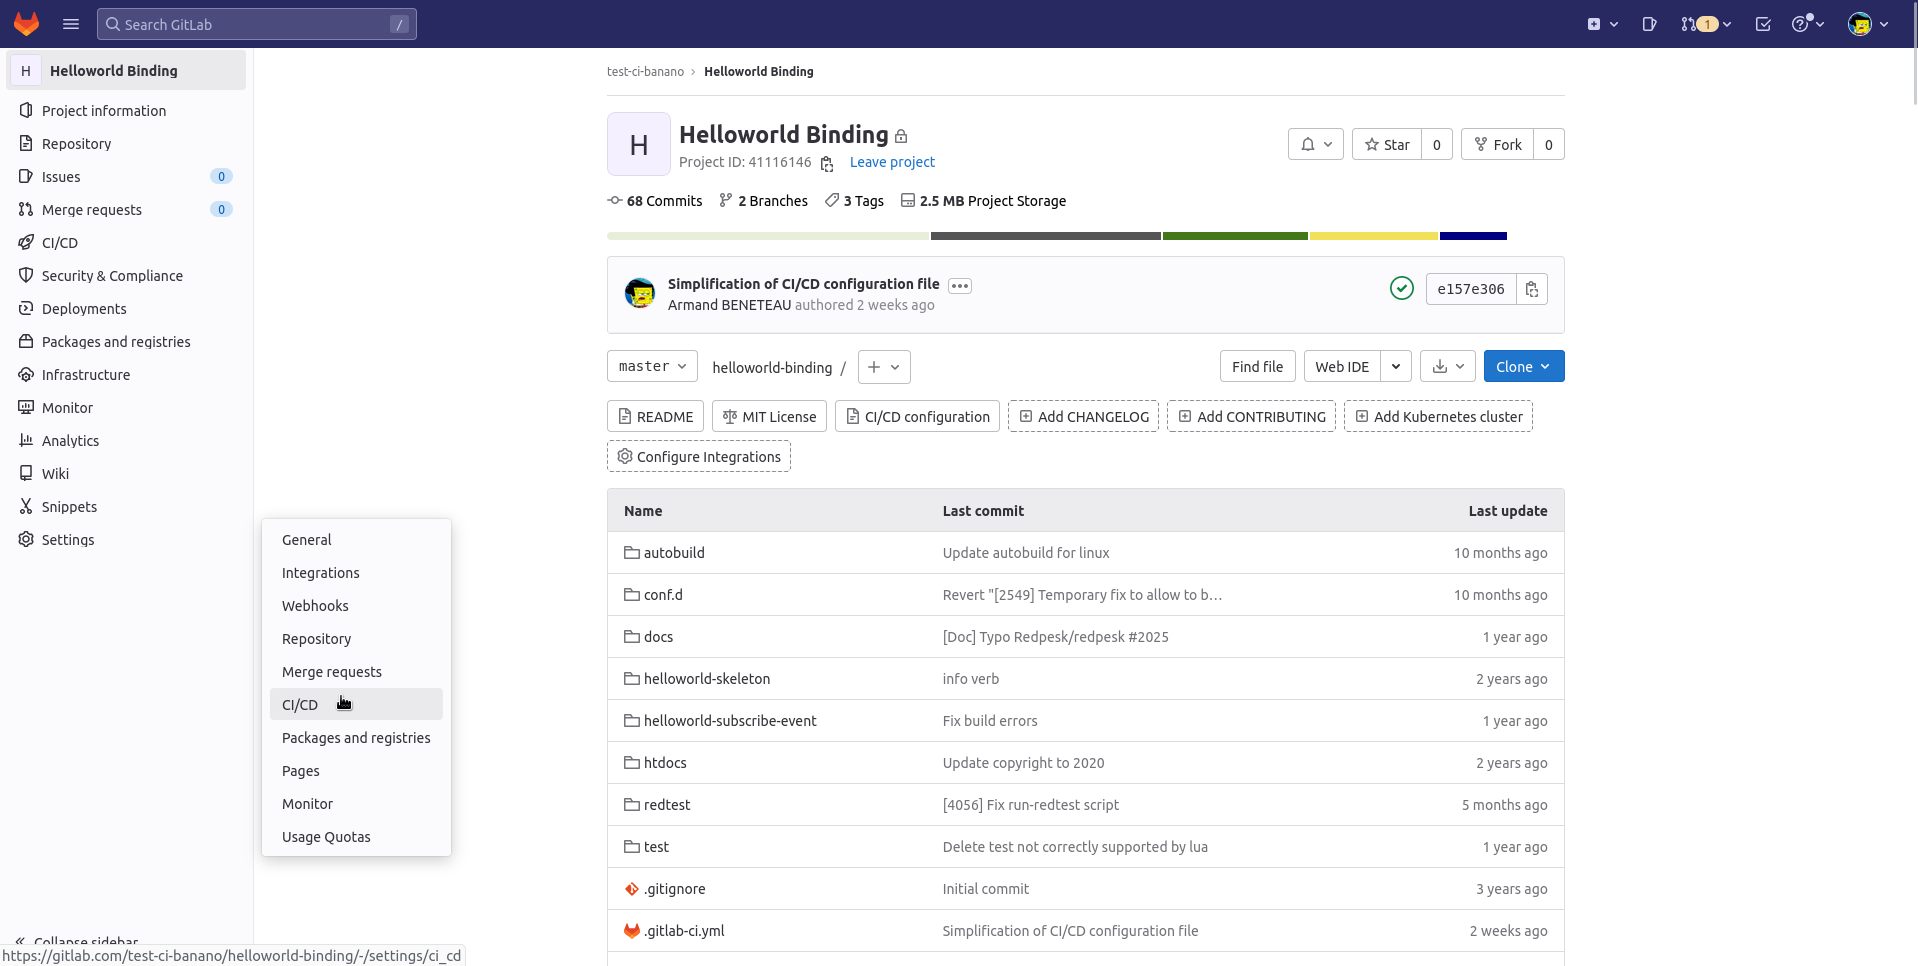
Finally, in the project Redpesk CI in your Gitlab group, add the .before_after_scripts_ci.yml file.
# IoT.bzh Company - redpesk
#
# This file is a generic file containing the script to be played before and after each job.
# This allows one to manage these scripts in a unique file
#
# In order to work correctly, this file needs to be included in the '.gitlab-ci.yml' file
# of the project.
#
# For more information please refer to:
#    - https://docs.gitlab.com/ee/ci/yaml/includes.html#use-default-configuration-from-an-included-configuration-file
#

default:
  # Specify the use of our own runner
  tags:
    - redpesk
    - my-company

  # Define the "before script" to use by default
  before_script:
    - rp-cli connections add "$RP_REMOTE_FACTORY_NAME" --url "$RP_REMOTE_FACTORY_URL" --token "$RP_REMOTE_FACTORY_TOKEN"
    - rp-cli connections use "$RP_REMOTE_FACTORY_NAME"

  # Define the "after script" to use by default
  after_script:
    - >
        if ([ $CI_JOB_STATUS == 'success' ] && [ $CI_JOB_STAGE == 'test' ]) || [ $CI_JOB_STATUS == 'failed' ] || [ $CI_JOB_STATUS == 'canceled' ]; then
          rp-cli applications update "$RP_FACTORY_APP" -p "$RP_FACTORY_PROJECT" --source-rev "$CI_MERGE_REQUEST_TARGET_BRANCH_NAME"
        fi
The “tags” in the file allow the selection of the CI runner provided in the redpesk stack.
The before_script commands configure the rp-cli binary installed on the custom CI runner. The after_script commands make sure that the application setting (especially the source revision) are not kept after the pipeline run.
Group variables set-up
Wherever your CI runner is, you need to declare some environment variables that are used in the different jobs. On the group level the following common variables need to be declared:
-
GIT_STRATEGY- Description: Gitlab global variable that defines how the sources are fetched at the beginning of each CI job. We set it to ‘none’ since we do not want to fetch sources in the runner
-
Value:
none
-
RP_REMOTE_FACTORY_NAME- Description: Name of the factory you want to use, you can put whatever you want, it has no real impact other than display
-
Value:
my-great-factory
-
RP_REMOTE_FACTORY_URL- Description: URL of the redpesk factory you are using (ex: https://community-app.redpesk.bzh)
-
Value:
https://community-app.redpesk.bzh
-
RP_REMOTE_FACTORY_TOKEN- Description: Token generated from the webUI, allowing the runner to connect to the factory (cf. rp-cli configuration). The value here below is only an example and cannot be used.
-
Value:
93e56690-62ac-4803-8528-ef1b443d5e24_1ba1007f-ddaa-44b8-846c-aac59d3c49fd
Gitlab project set-up
Gitlab CI configuration
In each project repository, add the .gitlab-ci.yml file at the repository root:
# IoT.bzh Company - redpesk
#
# This file allows, on a merge request, one to request a distant redpesk factory
# to build the source branch of the merge request and to run the corresponding tests.
# The results of these jobs will be available in the merge request UI
#

# Specify that this pipeline is on merge request only
workflow:
  rules:
    - if: $CI_PIPELINE_SOURCE == 'merge_request_event'

include:
  - project: 'test-ci-banano/redpesk-ci'
    ref: main
    file: '/.before_after_scripts_ci.yml'

build1:
  stage: build
  script:
    - rp-cli applications update "$RP_FACTORY_APP" -p "$RP_FACTORY_PROJECT" --source-rev "$CI_MERGE_REQUEST_SOURCE_BRANCH_NAME"
    - rp-cli applications build "$RP_FACTORY_APP" -p "$RP_FACTORY_PROJECT" --comment "[Gitlab CI] Started for MR '$CI_MERGE_REQUEST_IID', from author '$CI_COMMIT_AUTHOR'"

test1:
  stage: test
  script:
    - rp-cli applications test "$RP_FACTORY_APP" -p "$RP_FACTORY_PROJECT" --comment "[Gitlab CI] Started for MR '$CI_MERGE_REQUEST_IID', from author '$CI_COMMIT_AUTHOR'" -v
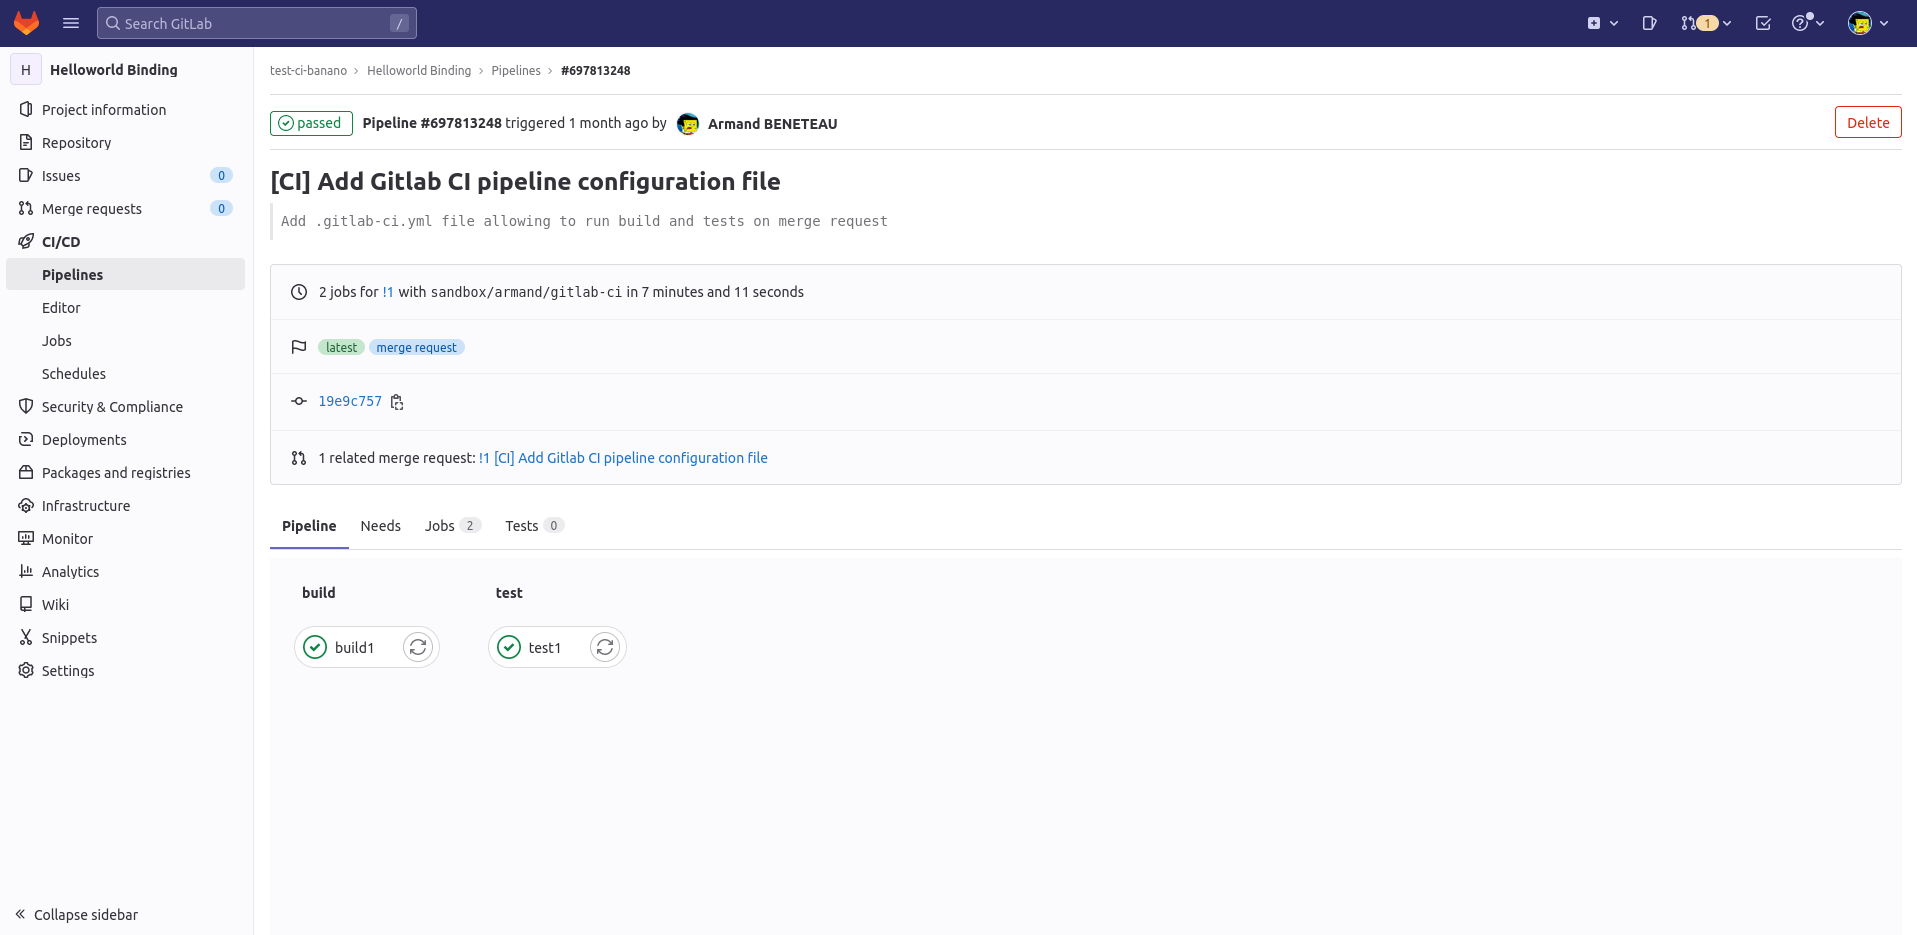
This file specifies that the workflow is played on merge request event only. It also includes the common configuration file located in the “Redpesk CI” project (that is in the same Gitlab group).
Finally, on the second half of the file the two jobs that will be run on each merge request opening: a build and a test in the redpesk factory, are described.
Project variables
In each project, additional Gitlab variables need to be declared in order for the CI jobs to work correctly. These variables can be declared under Settings/CI/CD/Variables.
Two variables need to be defined per project:
-
RP_FACTORY_APP- Description: Slug of the application in the redpesk factory
-
Example value:
helloworld-binding
-
RP_FACTORY_PROJECT- Description: Slug of the project in the redpesk factory
-
Example value:
gitlab-ci-project
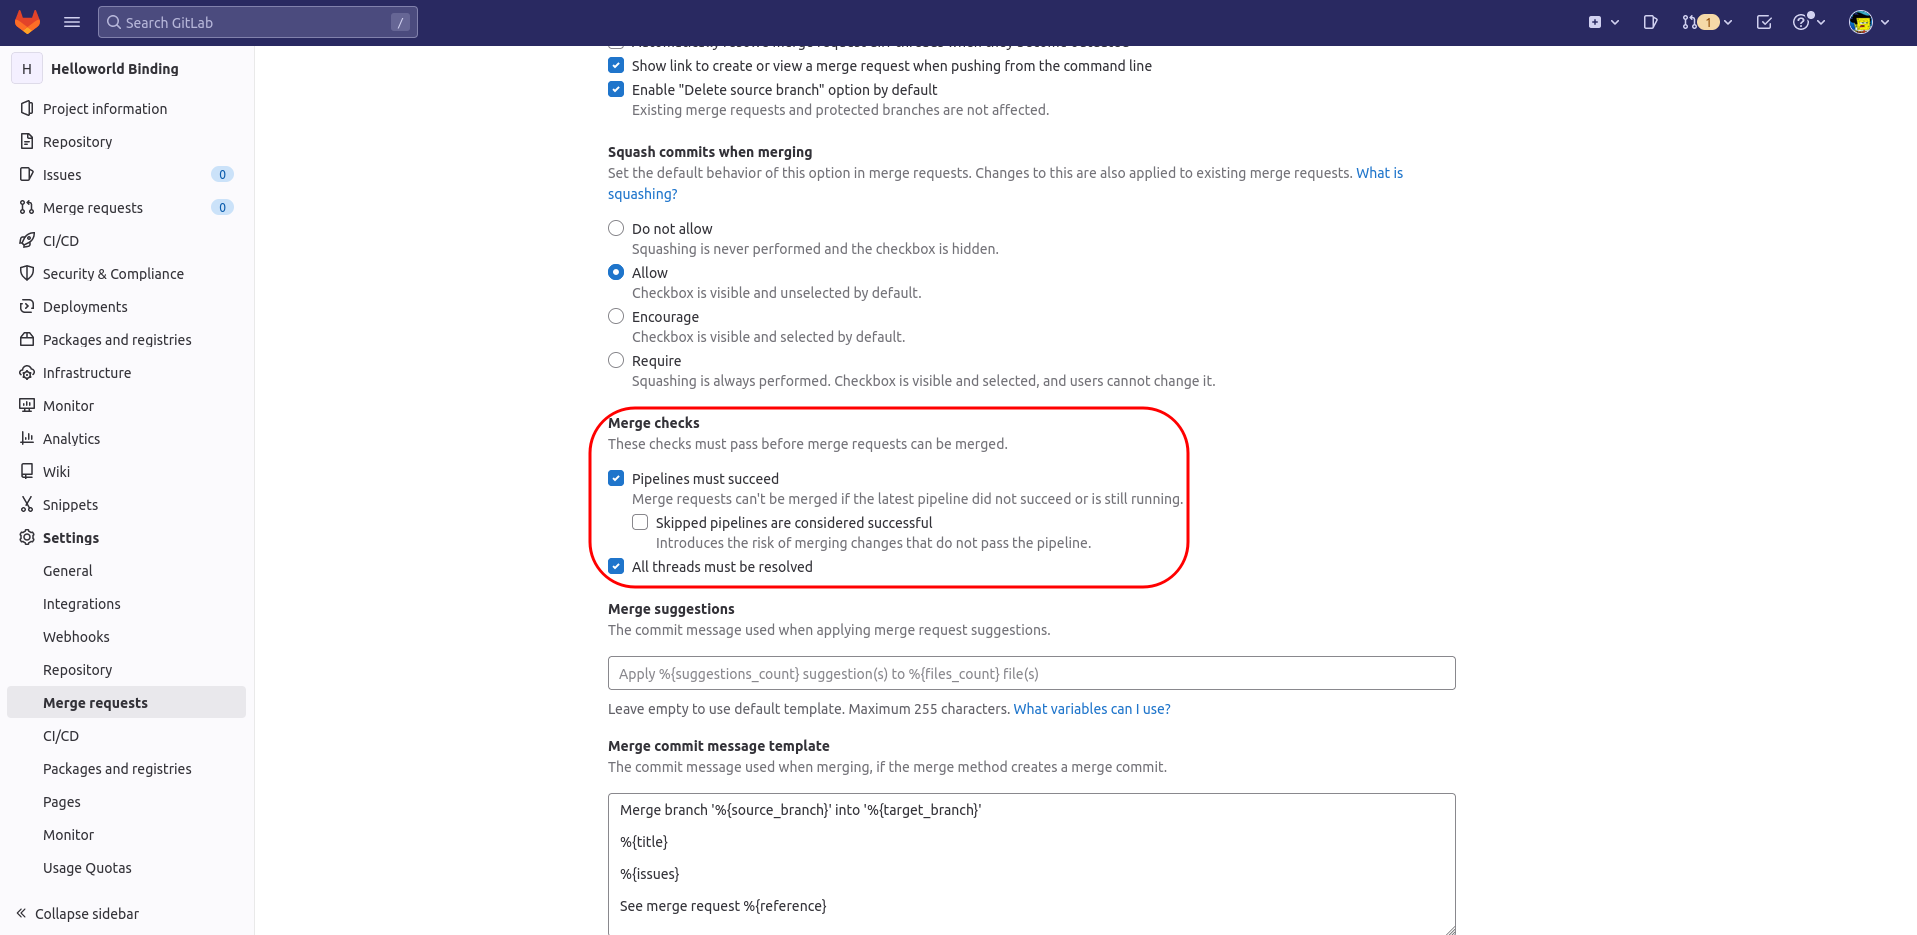
Merge request settings
If the success of the pipeline is mandatory to merge the merge request, you should check the case “Pipelines must succeed” in the “Merge requests” section of the project settings.
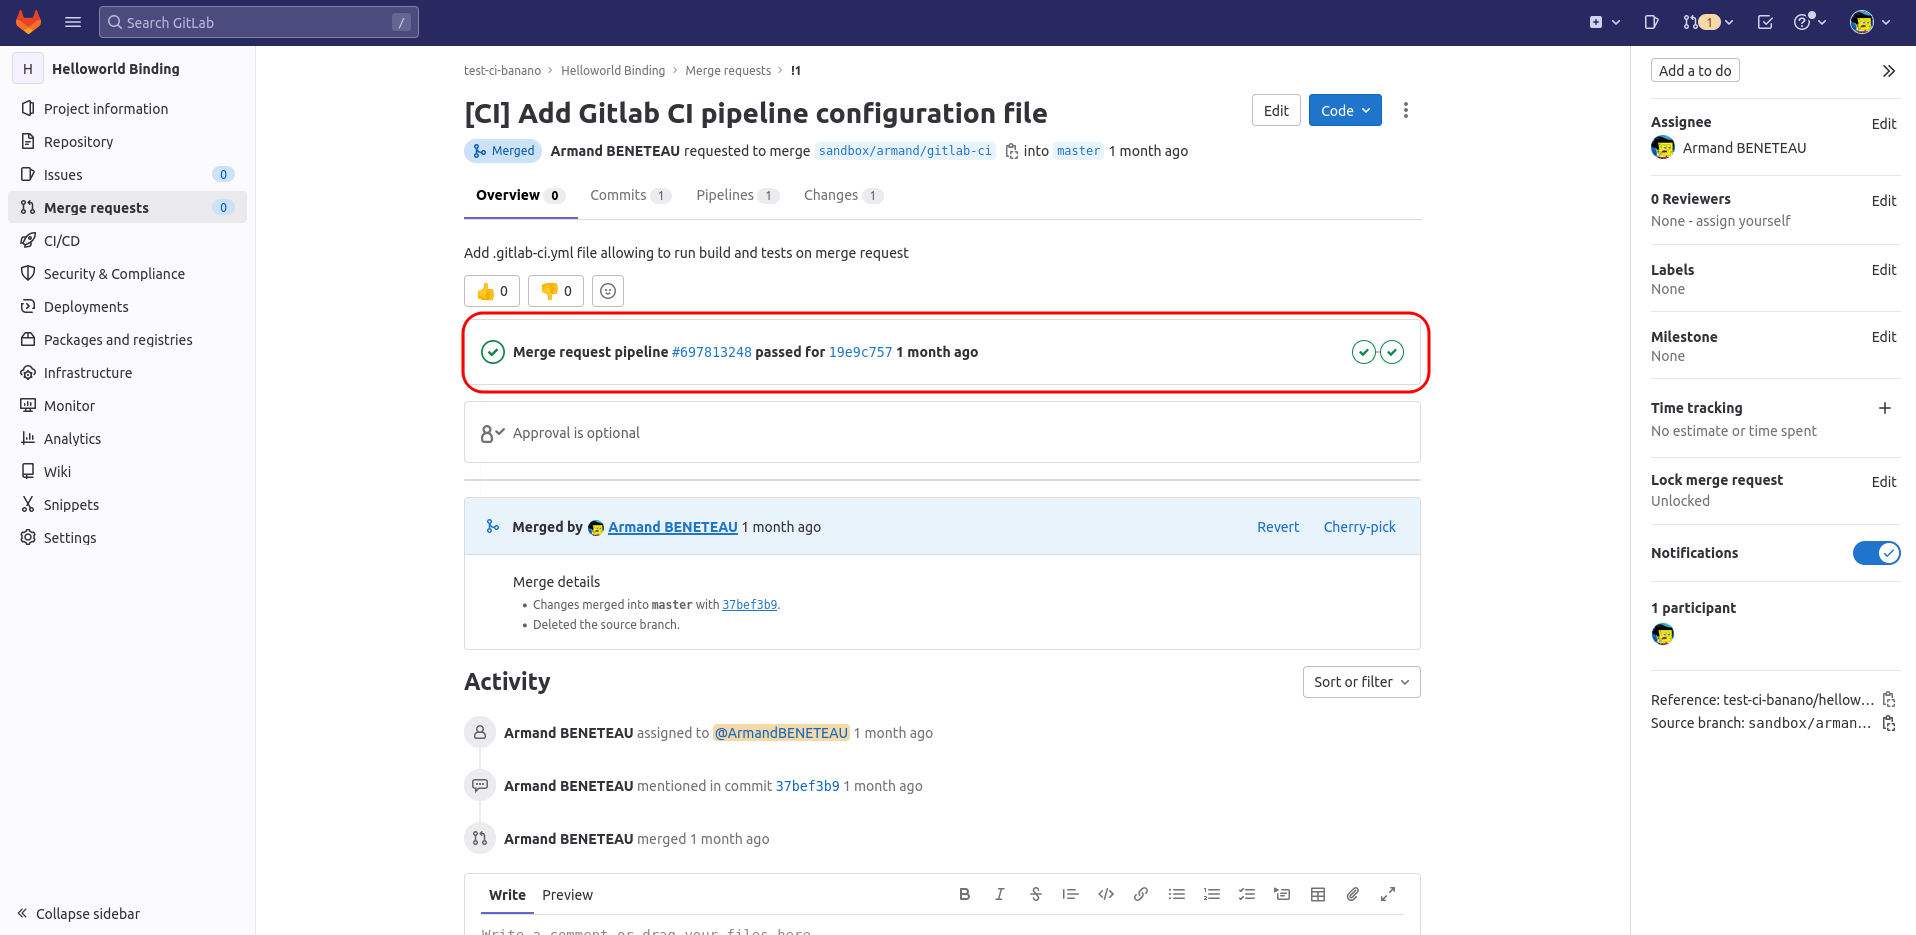
Enjoy your Gitlab CI set-up
You should now be able to enjoy the CI set-up! Open a merge request and check that the pipeline starts!