Running/Testing
Serial sniffing
When writing a new format plugin, or simply a configuration, it can be
useful to see the binary data transmitted by the binding, and received
from the serial link. A program such as intercerptty allows you to do
that by acting as a proxy between the binding and the real serial
device.
Compilation
interceptty does not figure in many repositories and has to be built
from its sources. Clone
this repo and run the following commands:
git clone https://github.com/geoffmeyers/interceptty
./configure
make
Usage
interceptty /dev/ttyUSB0
You have to use /tmp/interceptty as your serial device in the binding
instead of /dev/ttyUSB0. interceptty will then display all the data
which goes through /dev/ttyUSB0.
Kingpigeon devices
By default Kingpigeon devices uses a fixed IP address (192.168.1.110). You may need to add this network to your own desktop config before starting your test. Check hardware documentation on Device Store / King Pigeon
sudo ip a add 192.168.1.1/24 dev eth0 # eth0, enp0s20f0u4u1 or whatever is your ethernet card name
ping 192.168.1.110 # check you can ping your TCP modbus device
# check default config with browser at http://192.168.1.110
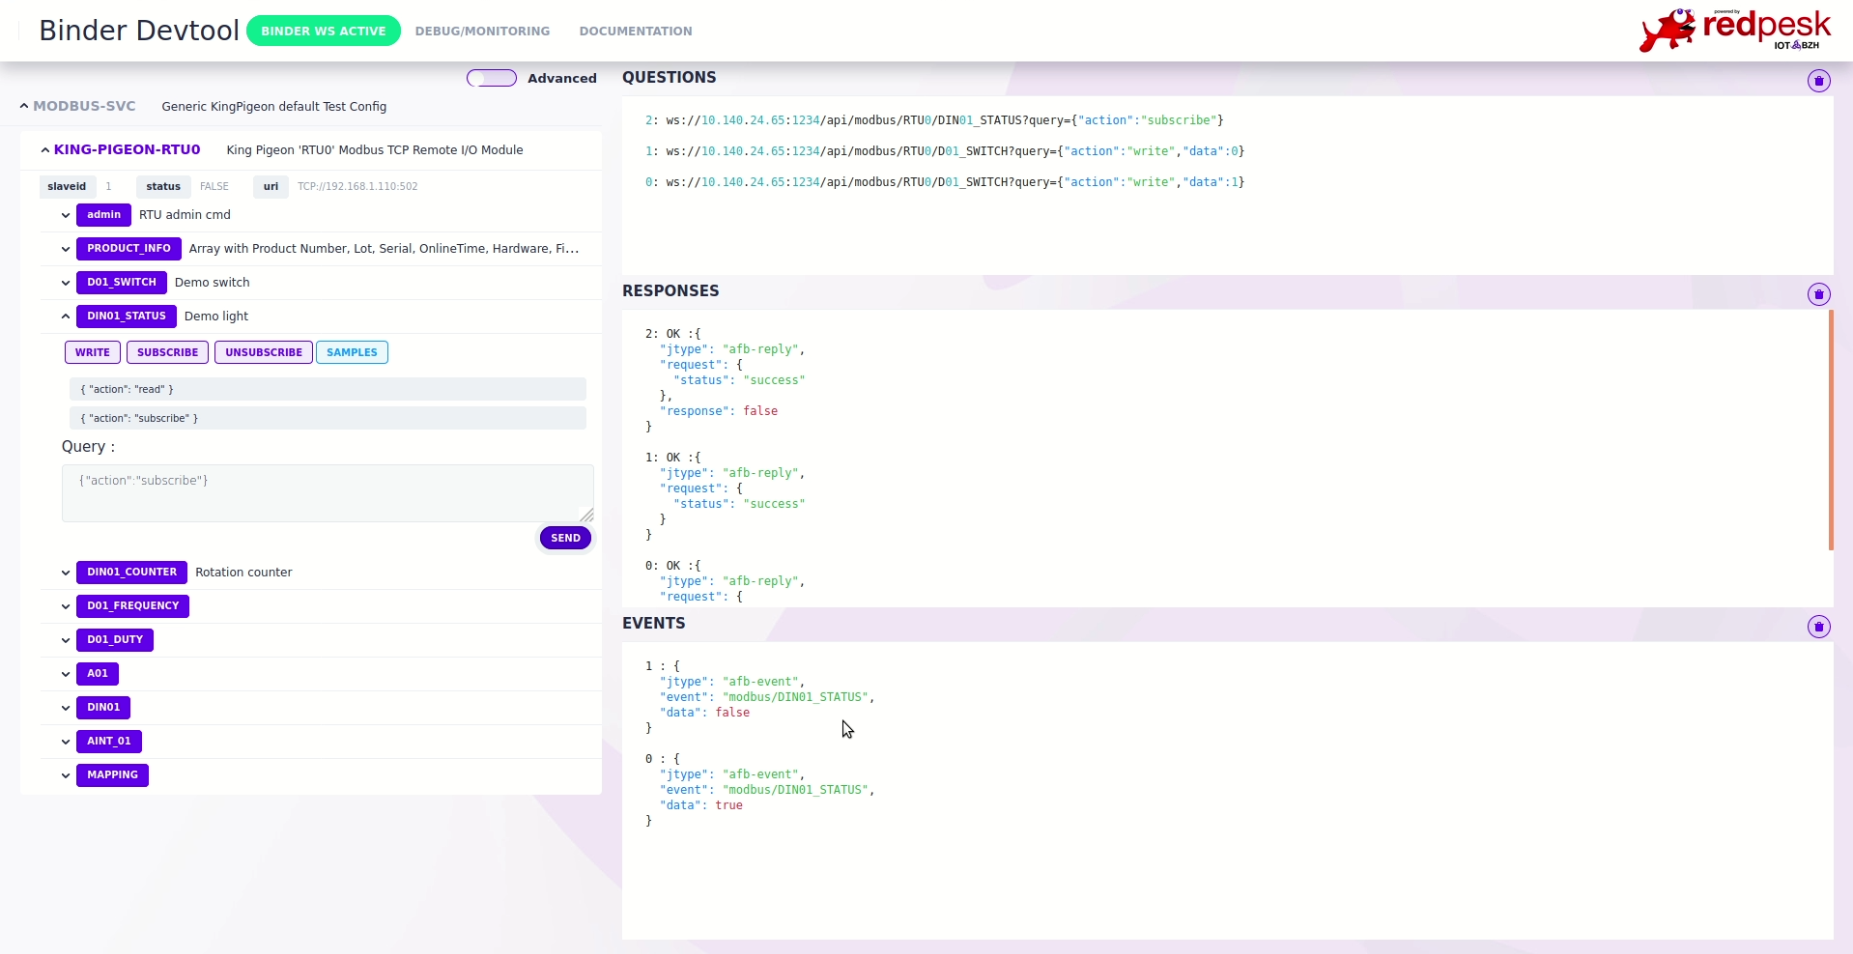
Start sample Binder
afb-binder --binding=./build/modbus-binding.so --config=./config-samples/control-modbus_kingpigeon-config.json -vvv
Open the binder devtool with your browser at http://localhost:1234/devtools/index.html

Test binding in CLI
afb-client --human ws://localhost:1234/api
# you can now send requests with the following syntax : <api> <verb> [eventual data in json format]
# here are some available examples for modbus binding :
modbus ping
modbus info
modbus RTU0/D01_SWITCH {"action":"write","data":1}
modbus RTU0/D01_SWITCH {"action":"read"}
modbus RTU0/D01_SWITCH {"action":"write","data":0}
modbus RTU0/D01_SWITCH {"action":"read"}
About timeouts
A request which has timed out will have a status code of -1001.
A time out can be a symptom of multiple causes:
- the RTU you’re using is slower than the default timeout value we use in configurations (250ms). Try to increase this value to something which fits your RTU better.
- you are sending a Modbus command which is not supported by the RTU,
and it simply does not reply (instead of sending an “Illegal function”
error for instance). You can use
intercepttyto debug your problem, as described in Configuration.
Adding your own config
While developing, a configuration of the format show in the
config-samples directory
is passed to the binder using the --config= option.
For production, redpesk’s modbus-binding package should be used.
modbus-binding is actually a resource binding, not a service; what
means it cannot be ran as provided. For that you need to create a
separate package containing your configuration and a manifest file which
indicates that you provide a configuration for another binding.
More details about resource bindings here.
Warning: some TCP Modbus devices, as KingPigeon’s, check SlaveID
even for building I/O. Config samples make the assumption that your
slaveID is set to 1.
Low level debugging
Before incriminating the binding part, make sure the physical connection to the modbus device works properly.
modbus-cli
For both TCP or serial modbus debugging, modbus-cli is a useful Python command line utility to help debugging issues.
It can be installed in a virtual Python environment with pip install modbus_cli
wireshark
For TCP Modbus, wireshark can be used to capture traffic and is able to decode the Modbus protocol
Redirect a serial interface over the network
It may be useful to redirect a serial interface over the network. The socat utility can be used for that purpose.
e.g. to redirect a serial interface over the 54321 TCP port and have it as /tmp/local_device on your local machine: (extract from modbus-cli documentation):
remote$ socat -d -d tcp-l:54321,reuseaddr file:/dev/ttyUSB0,raw,b19200
local$ socat -d -d tcp:remote_ip:54321 pty,link=/tmp/local_device,unlink-close=0
Log serial traffic on file
It may be useful to log everything that is read from or written to a serial interface to files for a posteriori analysis.
socat can again be used for that purpose.
-
socat -r r1.txt -R r2.txt /dev/ttyX,b9600,raw,echo=0 PTY,/tmp/ttyX,raw,echo=0,wait-slavewill create a PTY on/tmp/ttyX - point your application (here the binding) to
/tmp/ttyXrather than/dev/ttyX - the files
r1.txtandr2.txtwill then contain traffic from both sides of the channel
Generate a modbus request from the command line
For serial Modbus communication, you can generate a simple Modbus request from the command line.
e.g. for a device with slave id = 1, a register read:
echo -ne "\x01\x04\x00\x00\x00\x02\x71\xcb" | socat - /dev/ttyUSB_RS485,b9600 | od -t x1
Explanation:
-
socat - /dev/ttyUSB_RS485,b9600will read bytes from standard input and write them to/dev/ttuUSB_RS485(setting the baud rate to 9600) - the bytes sent are made of:
-
01: the slave id (1) -
04: the modbus function, 4 = register read -
00 00 00 02: number of 16-bit registers to read (2) -
71 CB: the CRC16 of the message
-
-
od -t x1displays the reply in hexadecimal
Typical output:
0000000 01 04 04 43 73 26 71 c5 9f
0000011
Interpretation:
-
01: slave id -
04: function id (4 = register read) -
04: number of bytes -
43 73 26 71: the actual value (243.15 in 32-bit float) -
C5 9F: CRC16